DIY Painted Upholstery on a $20.00 Thrifted Vintage Sofa
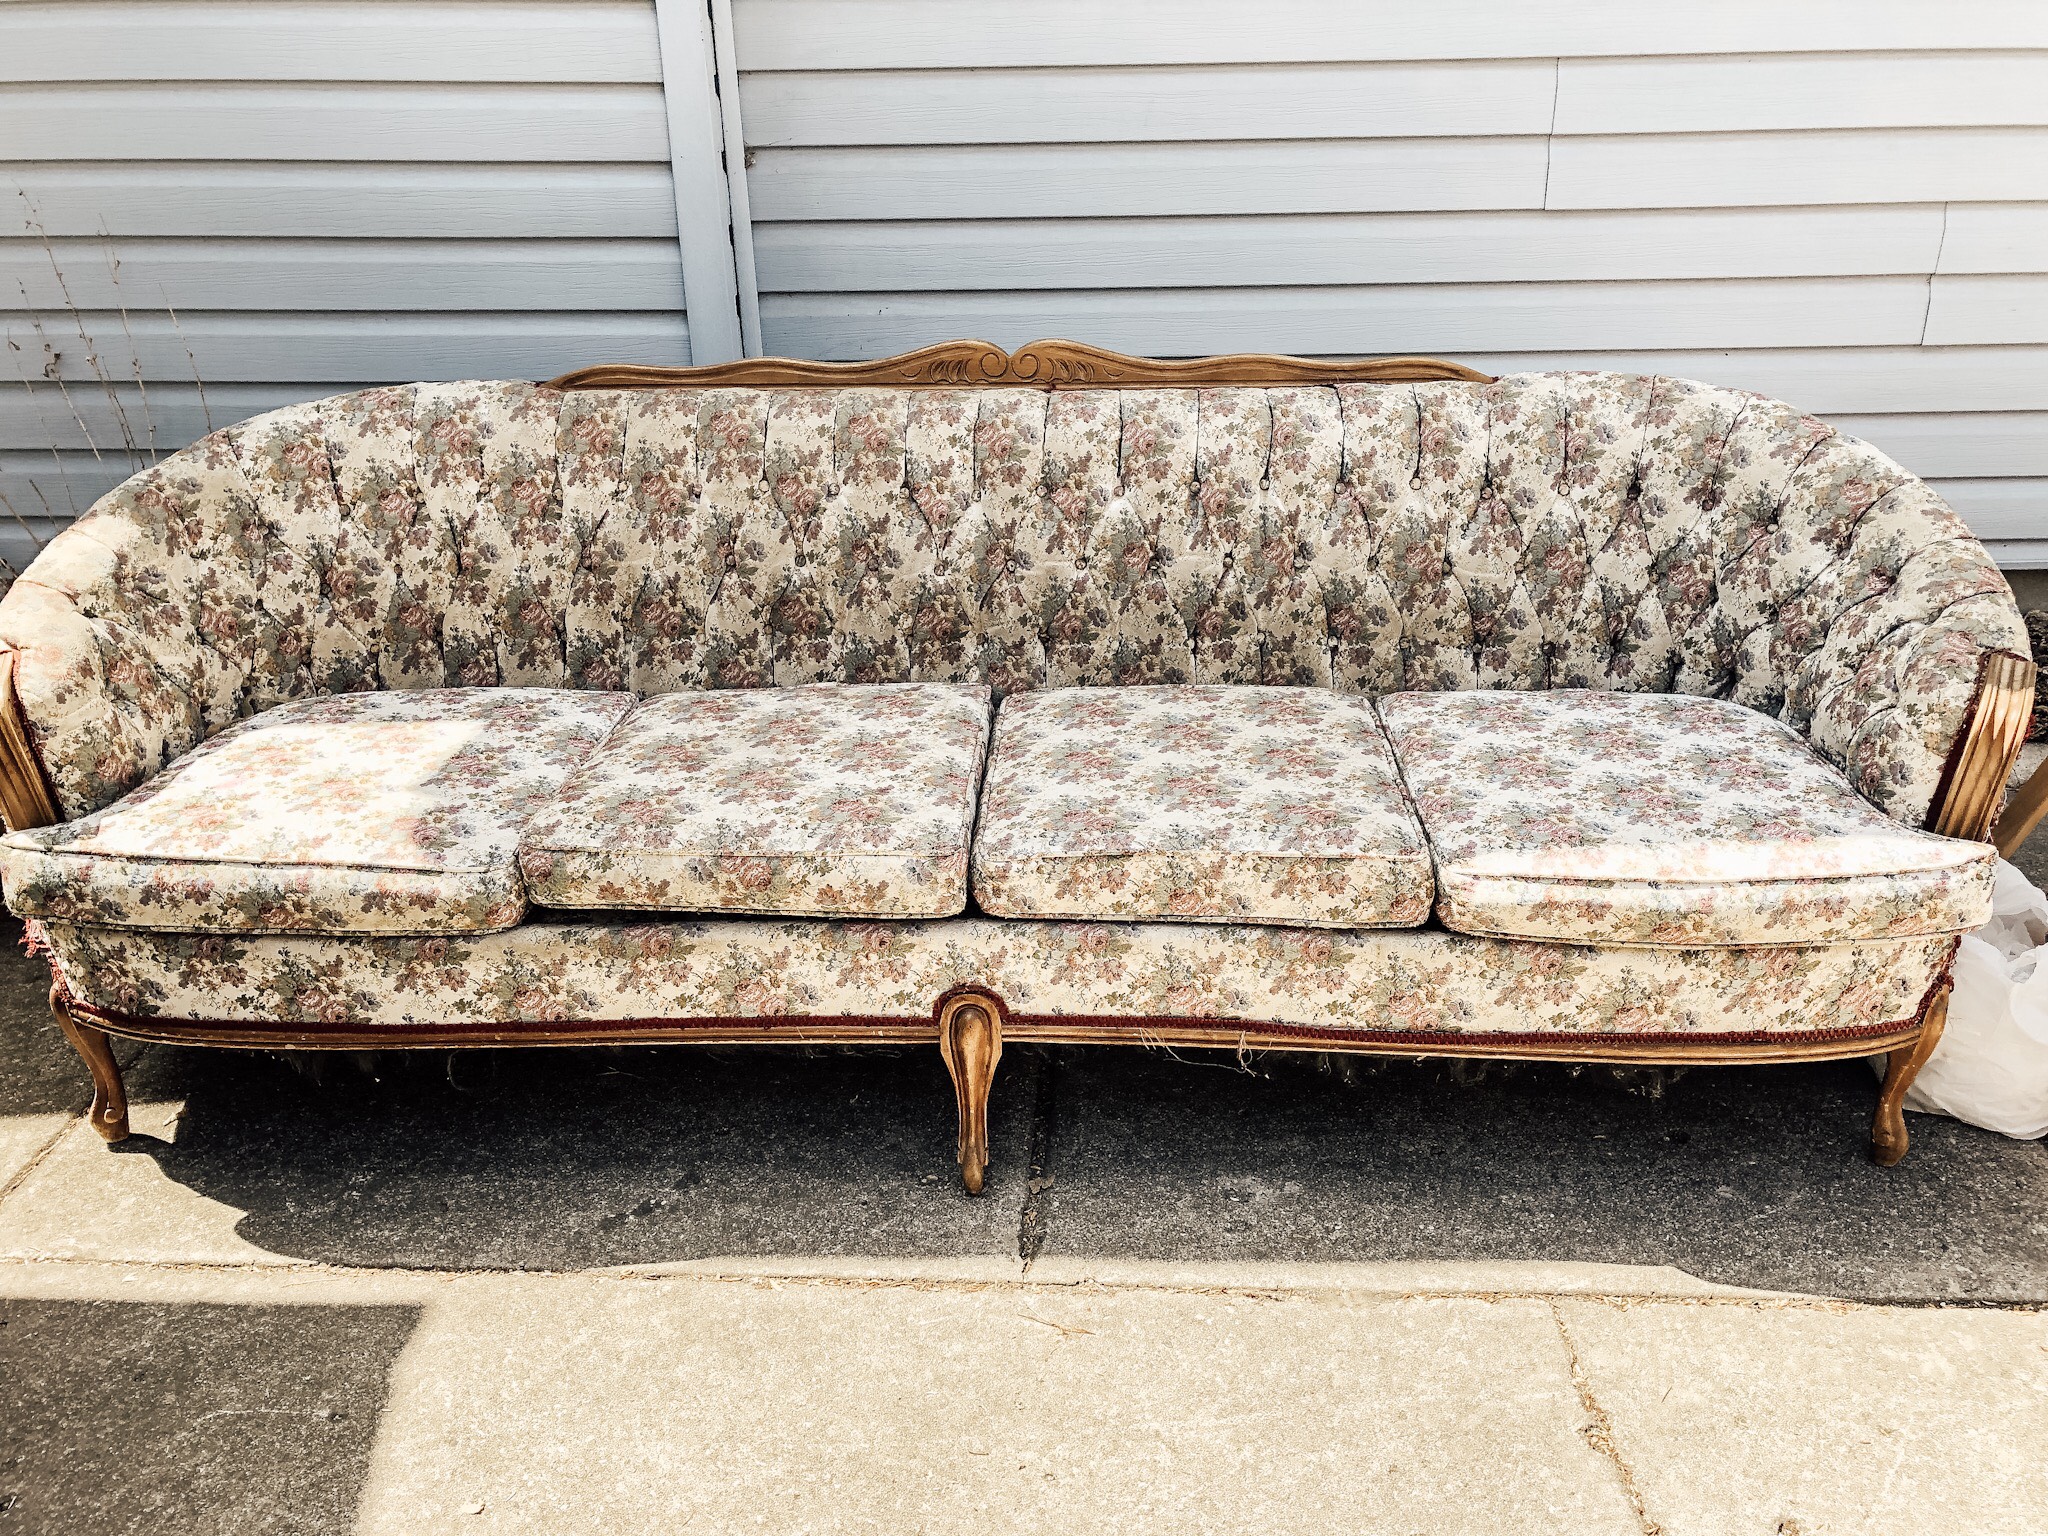
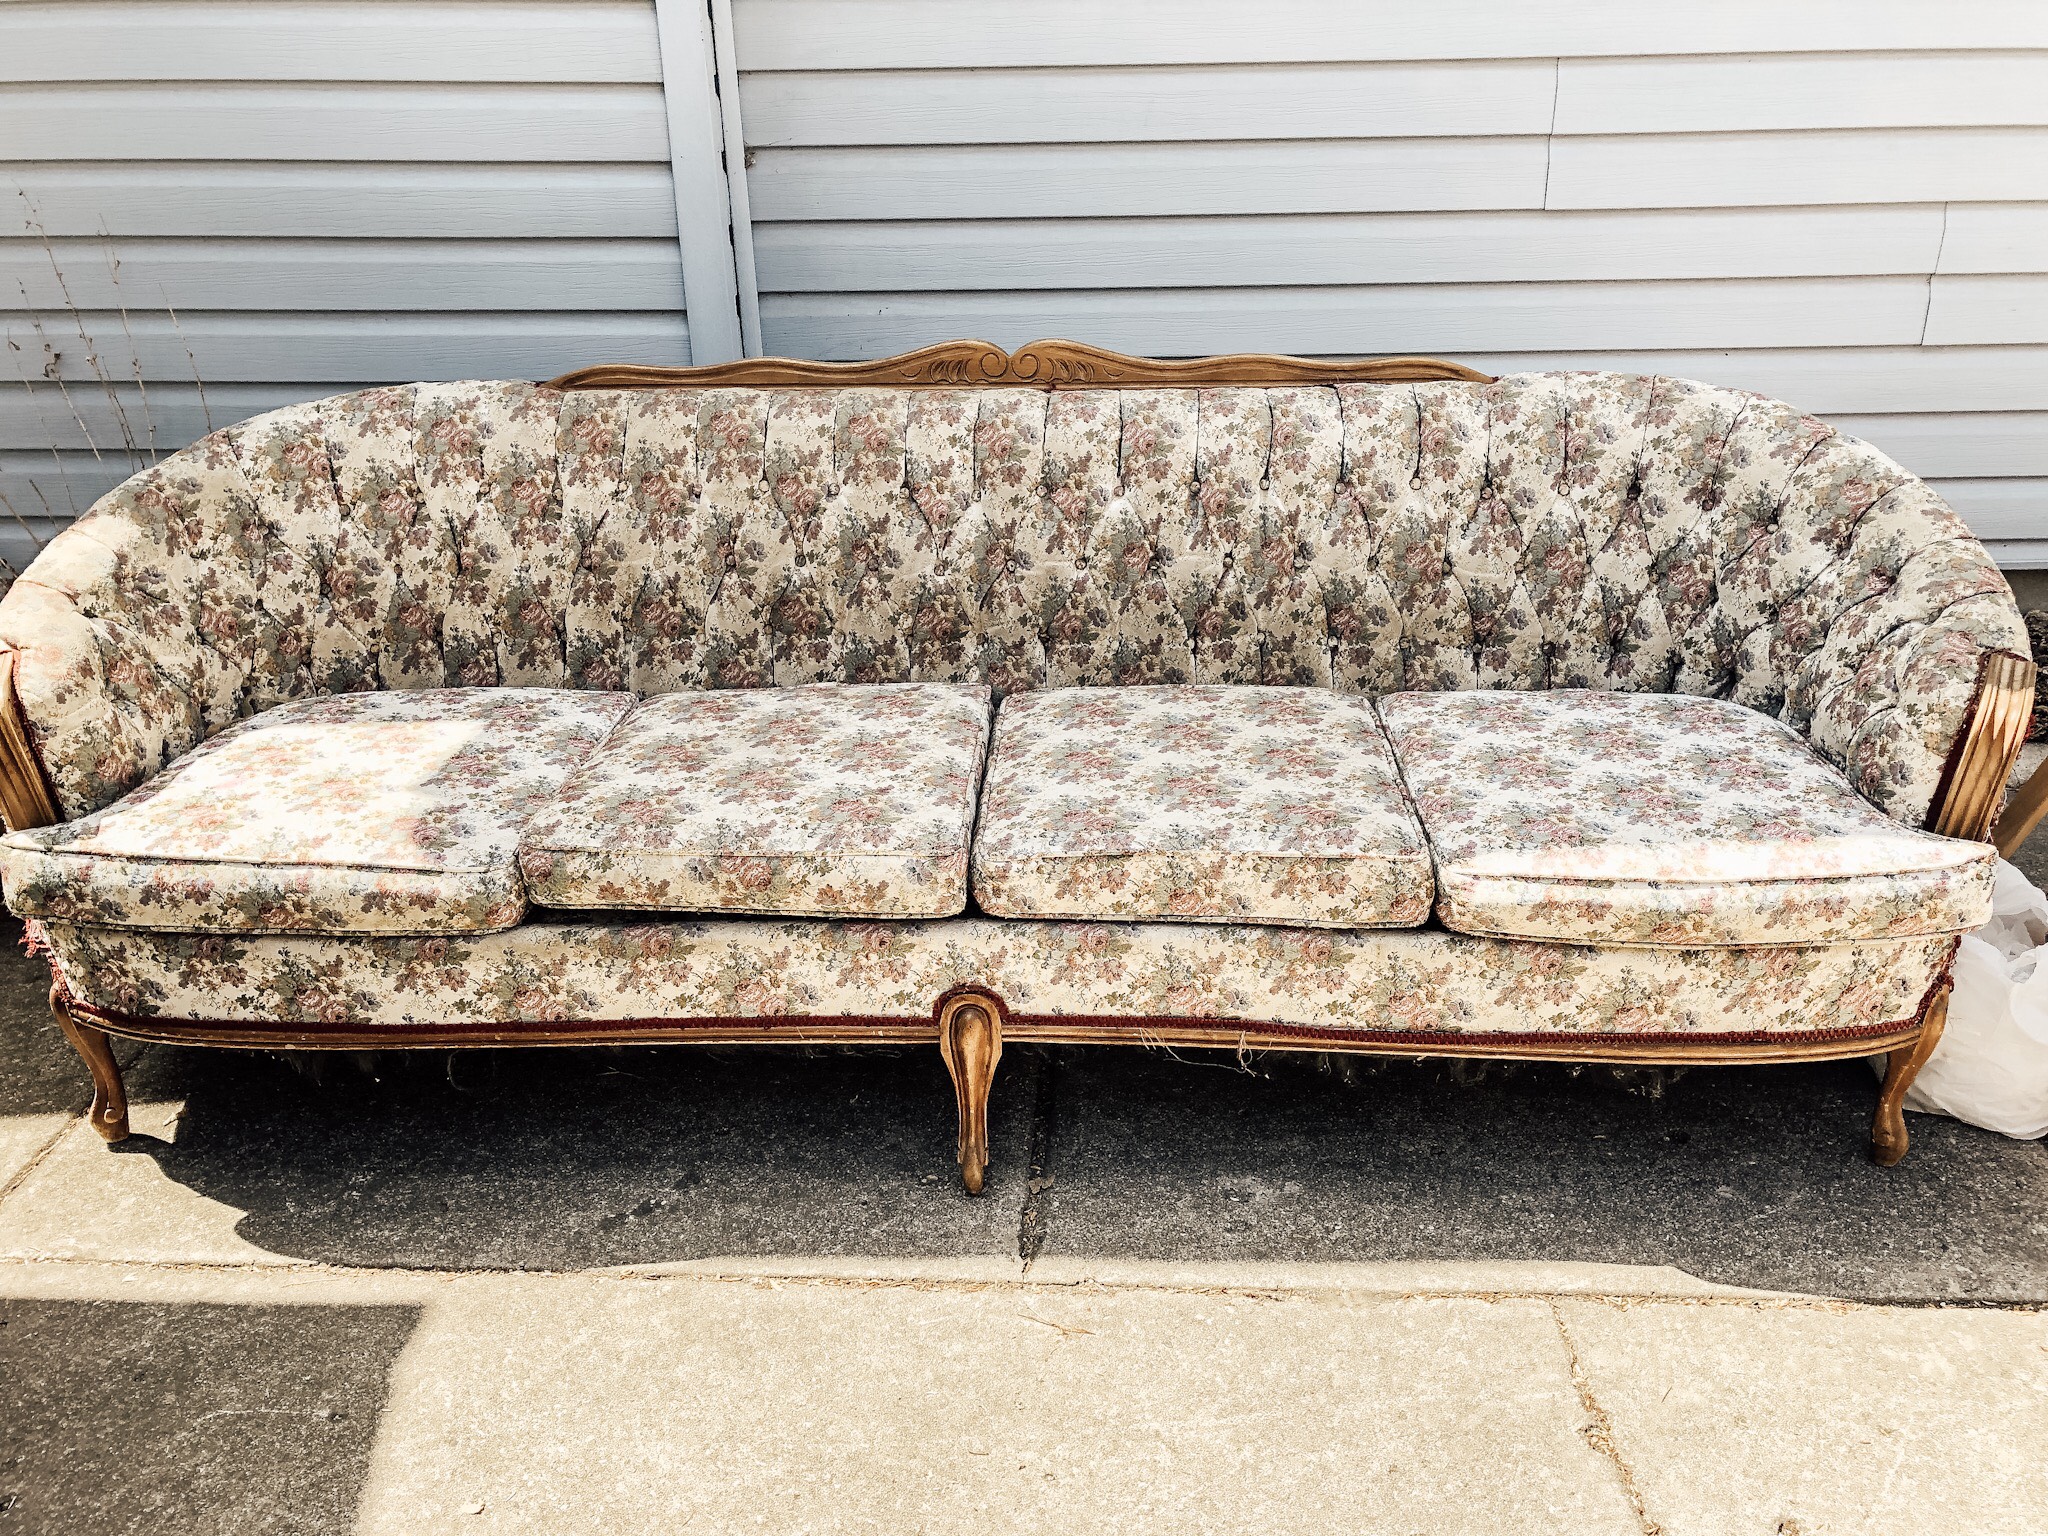
It was love at first sight! I fell for her curves, detailed legs and tufted back. It was easy to look beyond what some would see as flaws. I simply saw all her character and that all she needed was a little loving. So I sat myself down on her dirty and stained cushions so no one would snatch her up as I waited to find out her asking price?
“$20.00? SOLD!” Can you see me happy dancing?
“What are you going to do with it?”
“I’m going to make her beautiful again. I’m gonna paint her upholstery and then put her on our front porch. She’ll be so inviting and comfortable for morning coffee with my Honey and afternoon naps in the shade on hot summer days. She’s perfect! Thank you!”
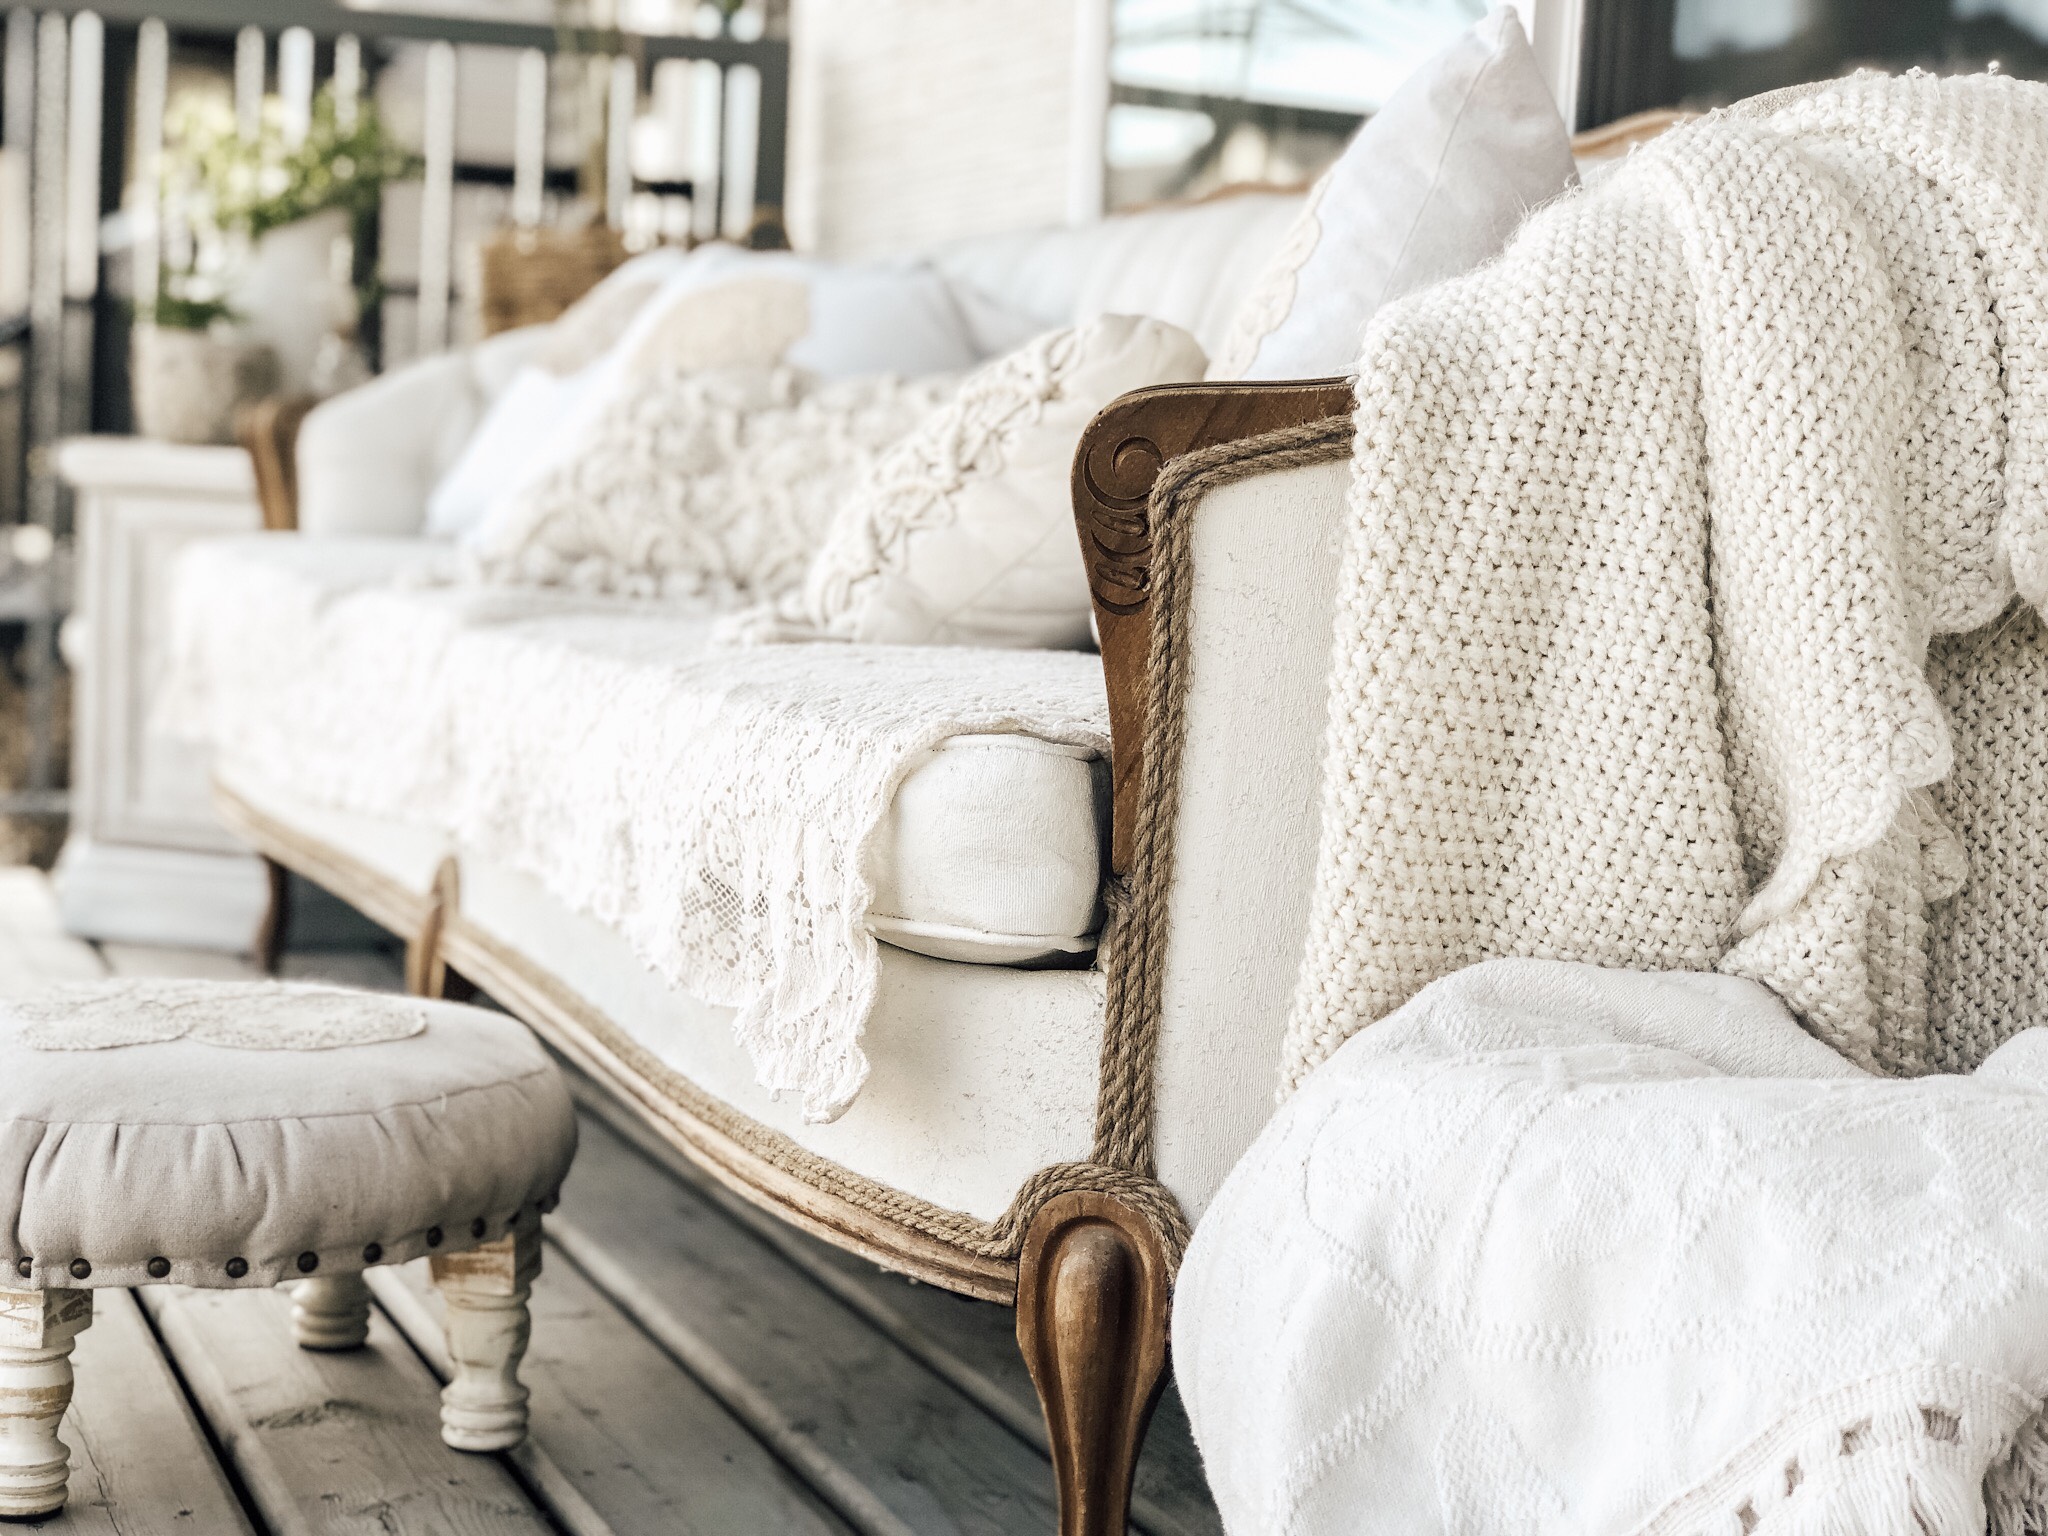
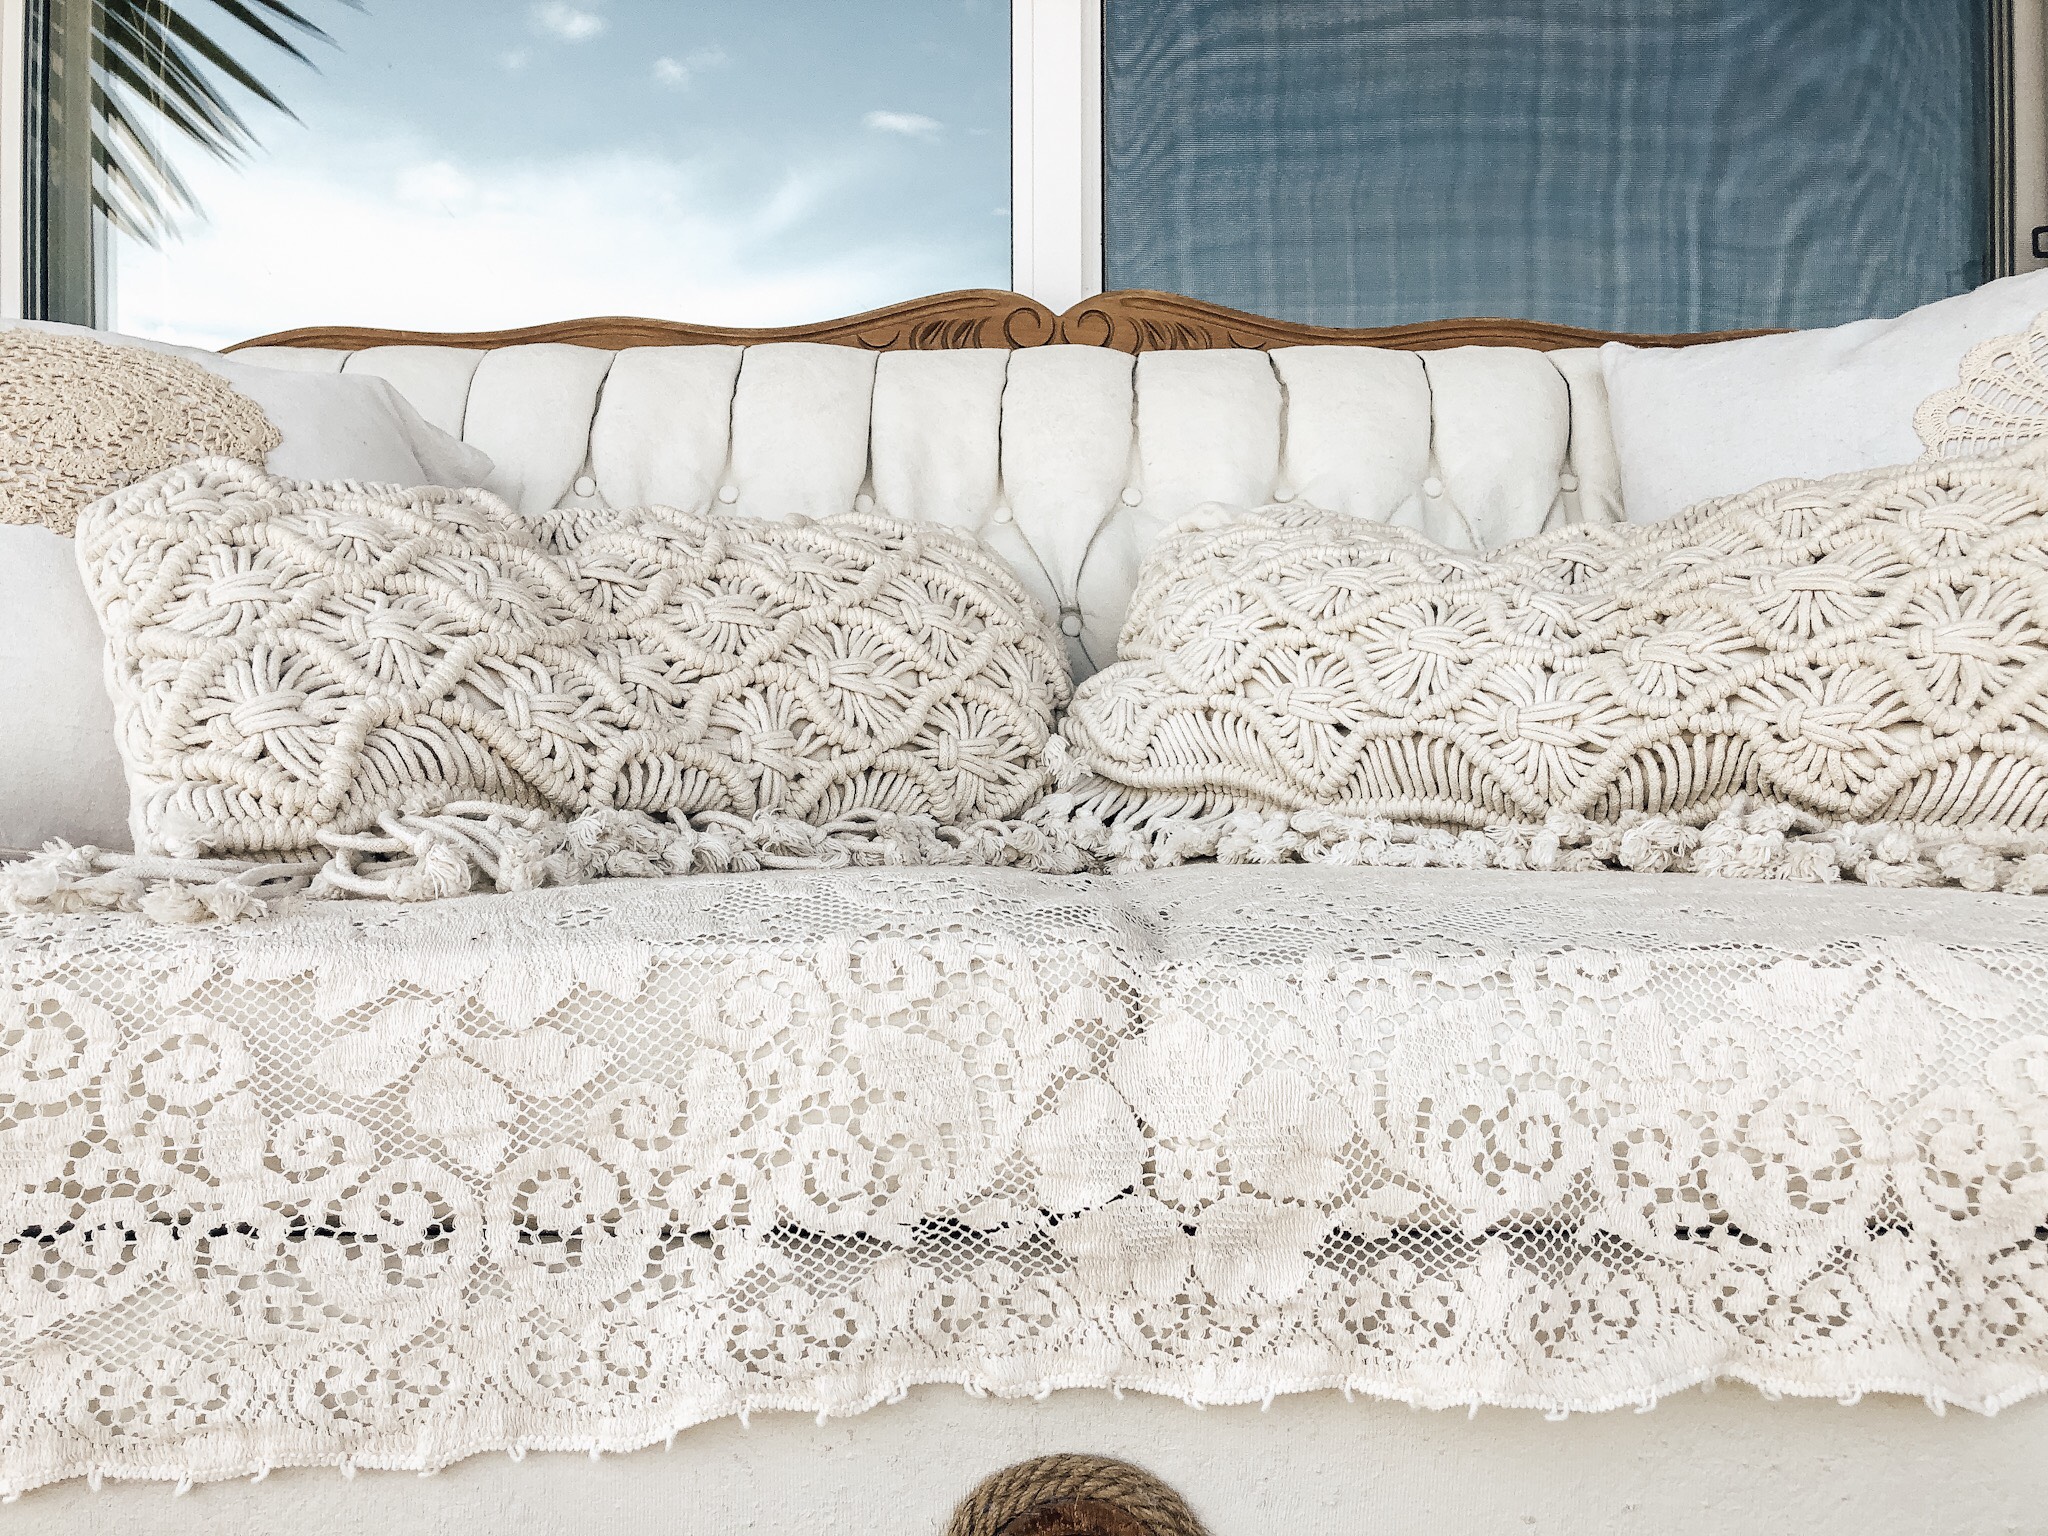
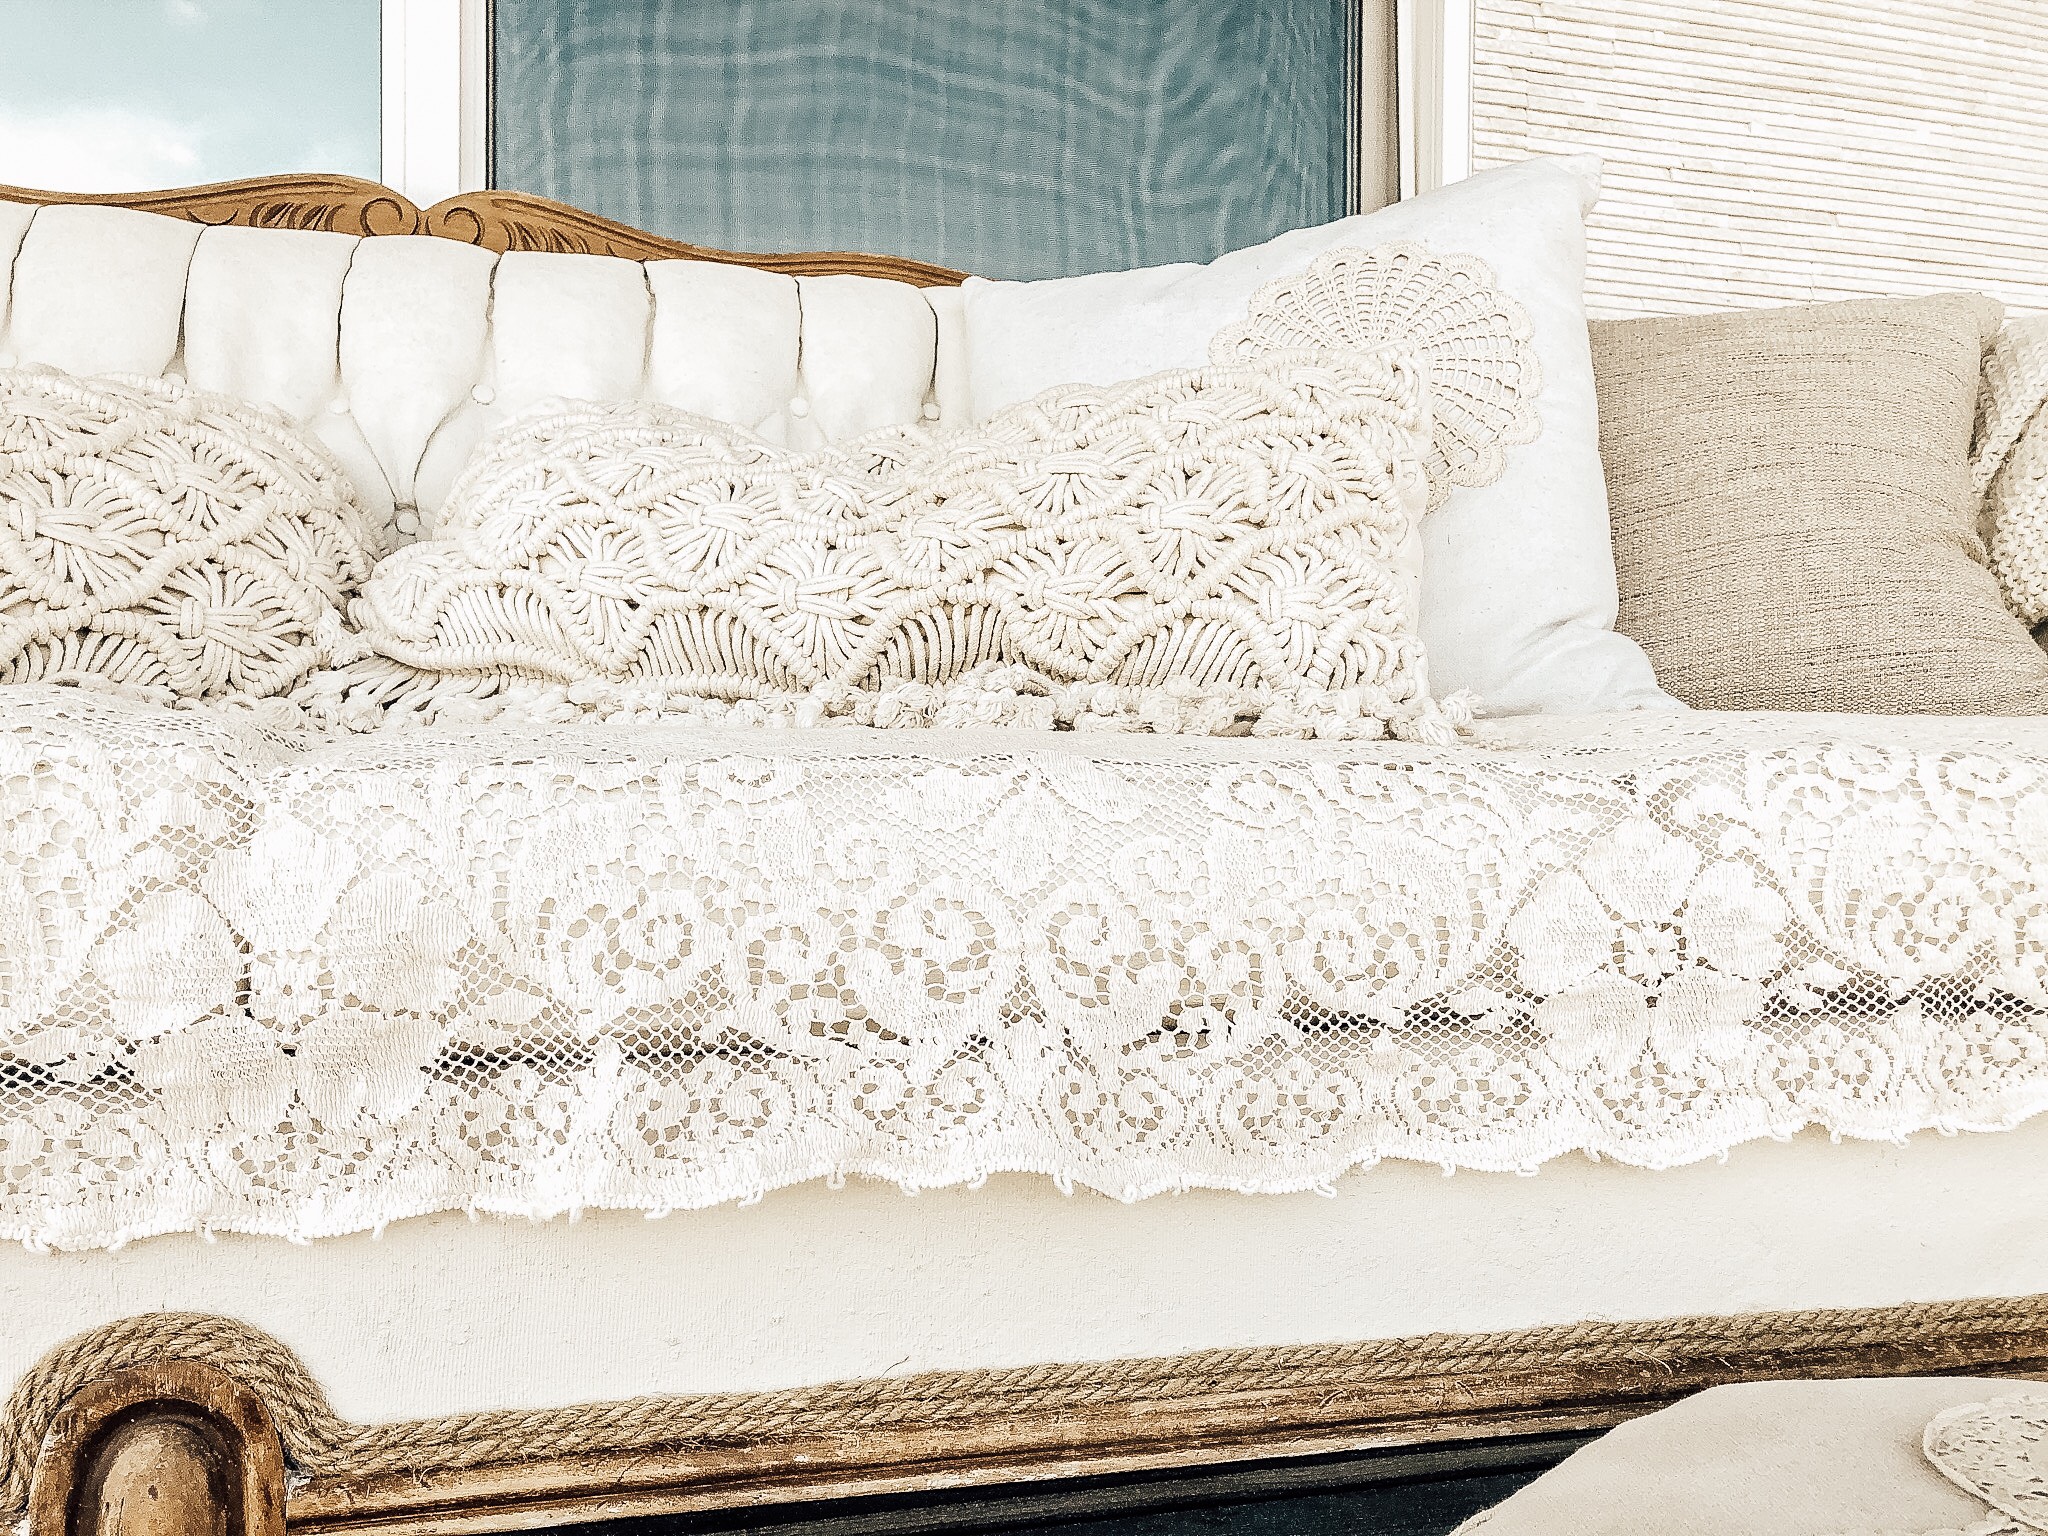
That’s just what I did and look how beautiful she is! It’s a bit challenging to get a full scale photo due to the restrictions of our narrow porch but you’ll see her charm.
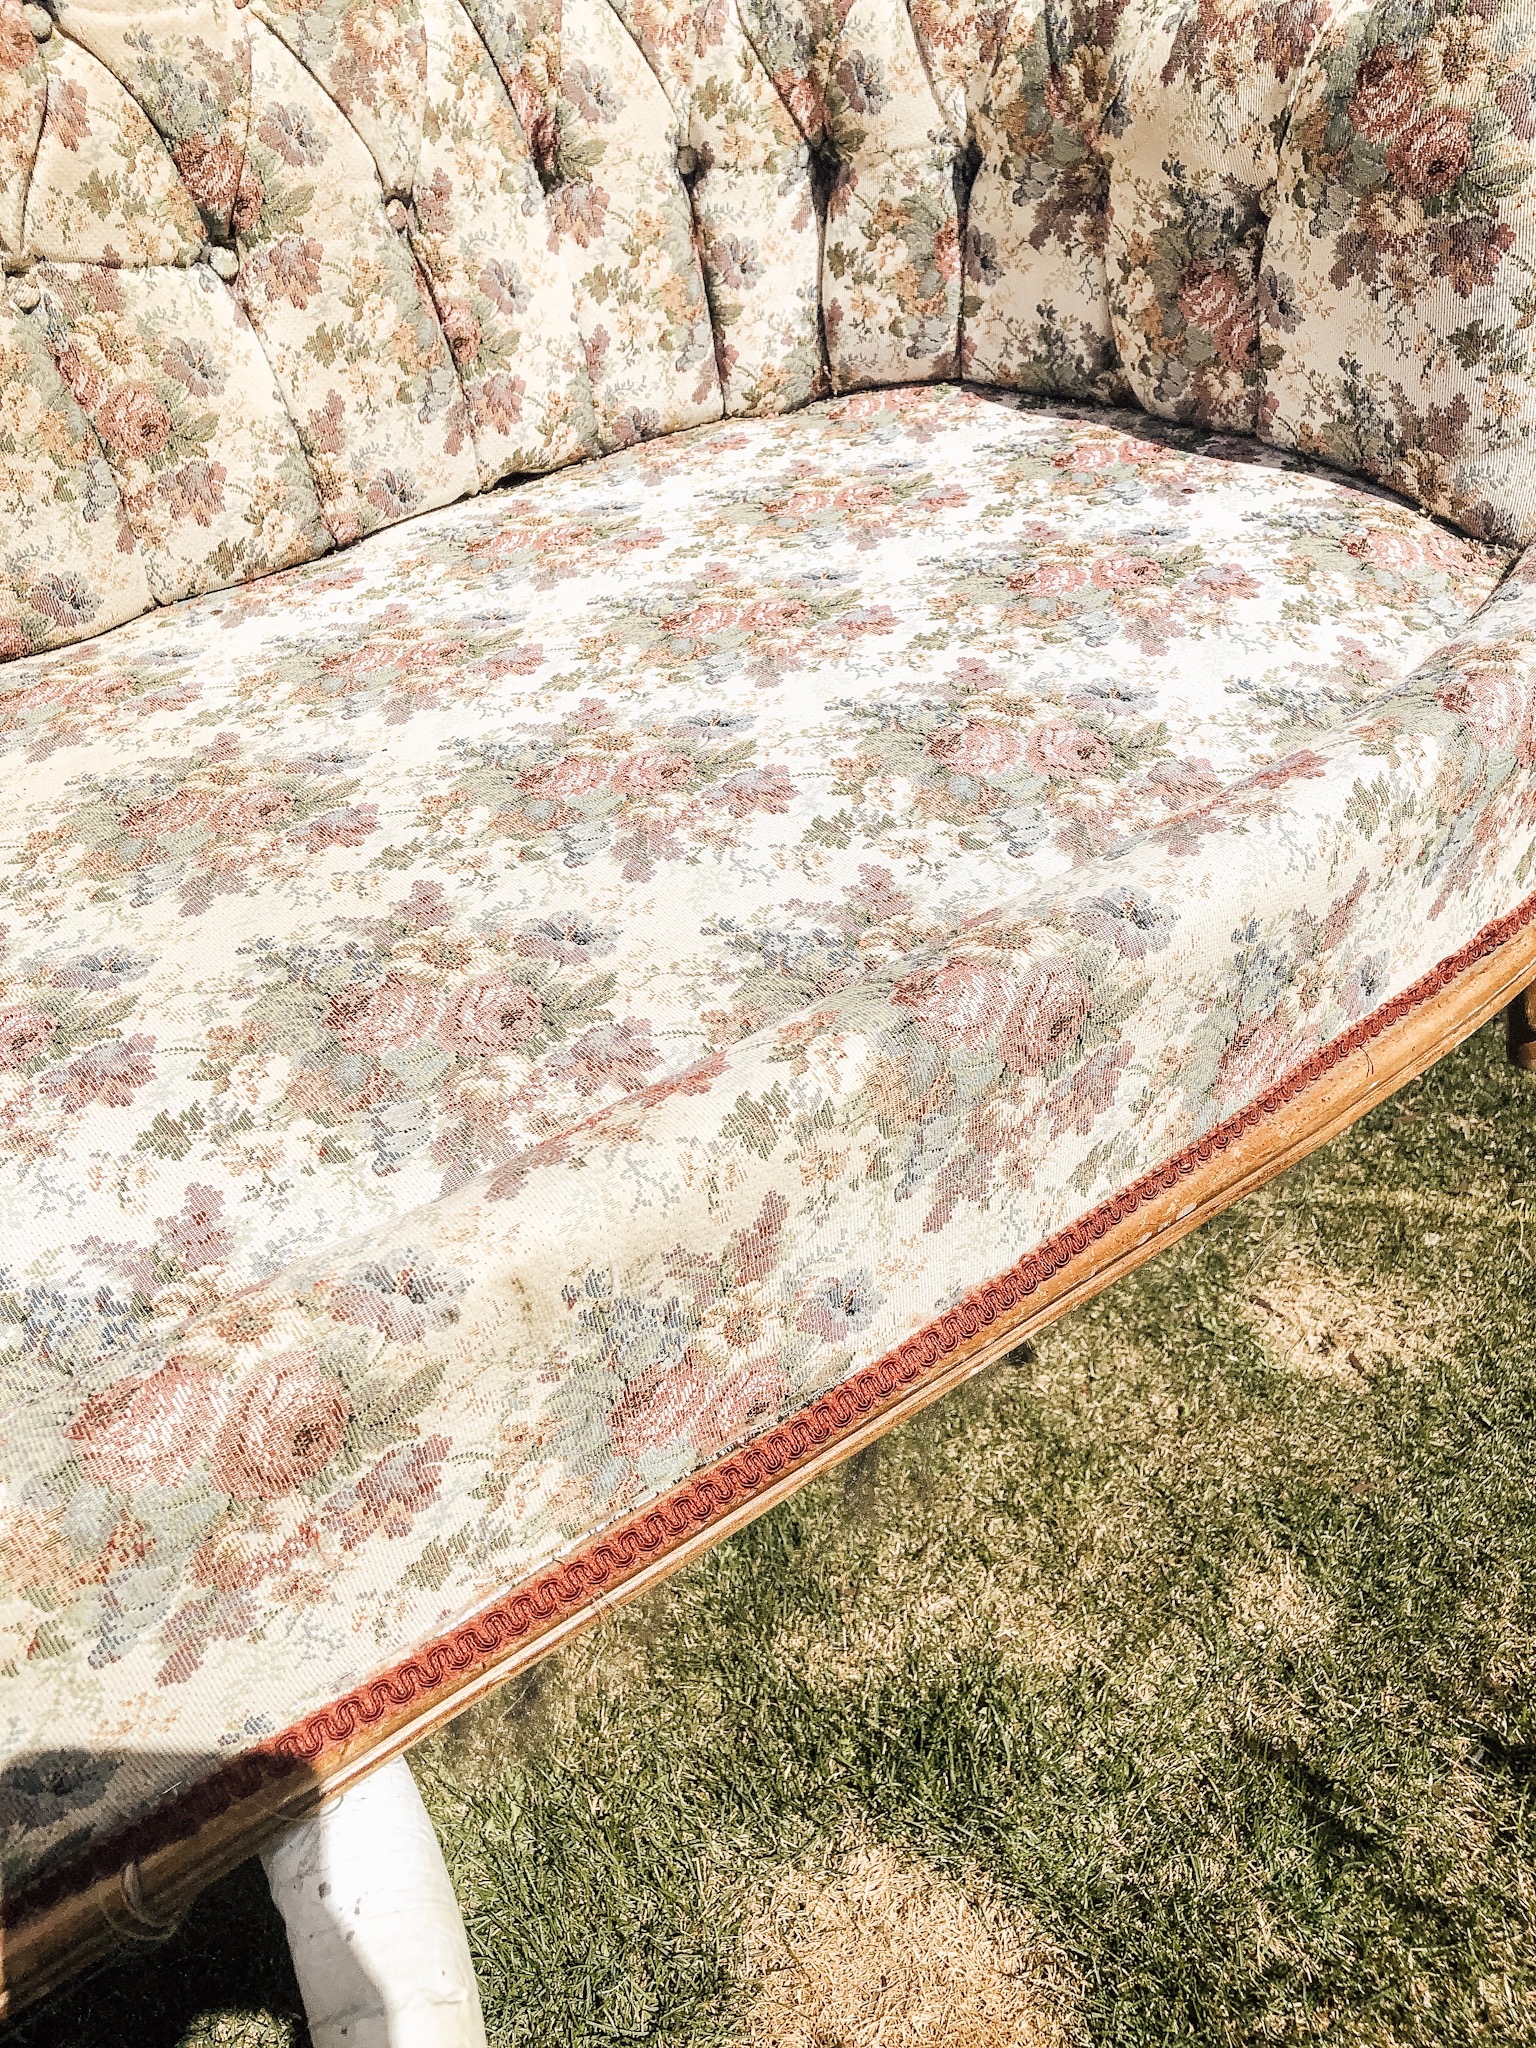
She’s far from perfect, there’s still evidence of the abuse she took at the claws of a few cats but she’s got character.
She may be a bit leathery from the half dozen coats of paint I gave her but she looks and feels fab for her age.
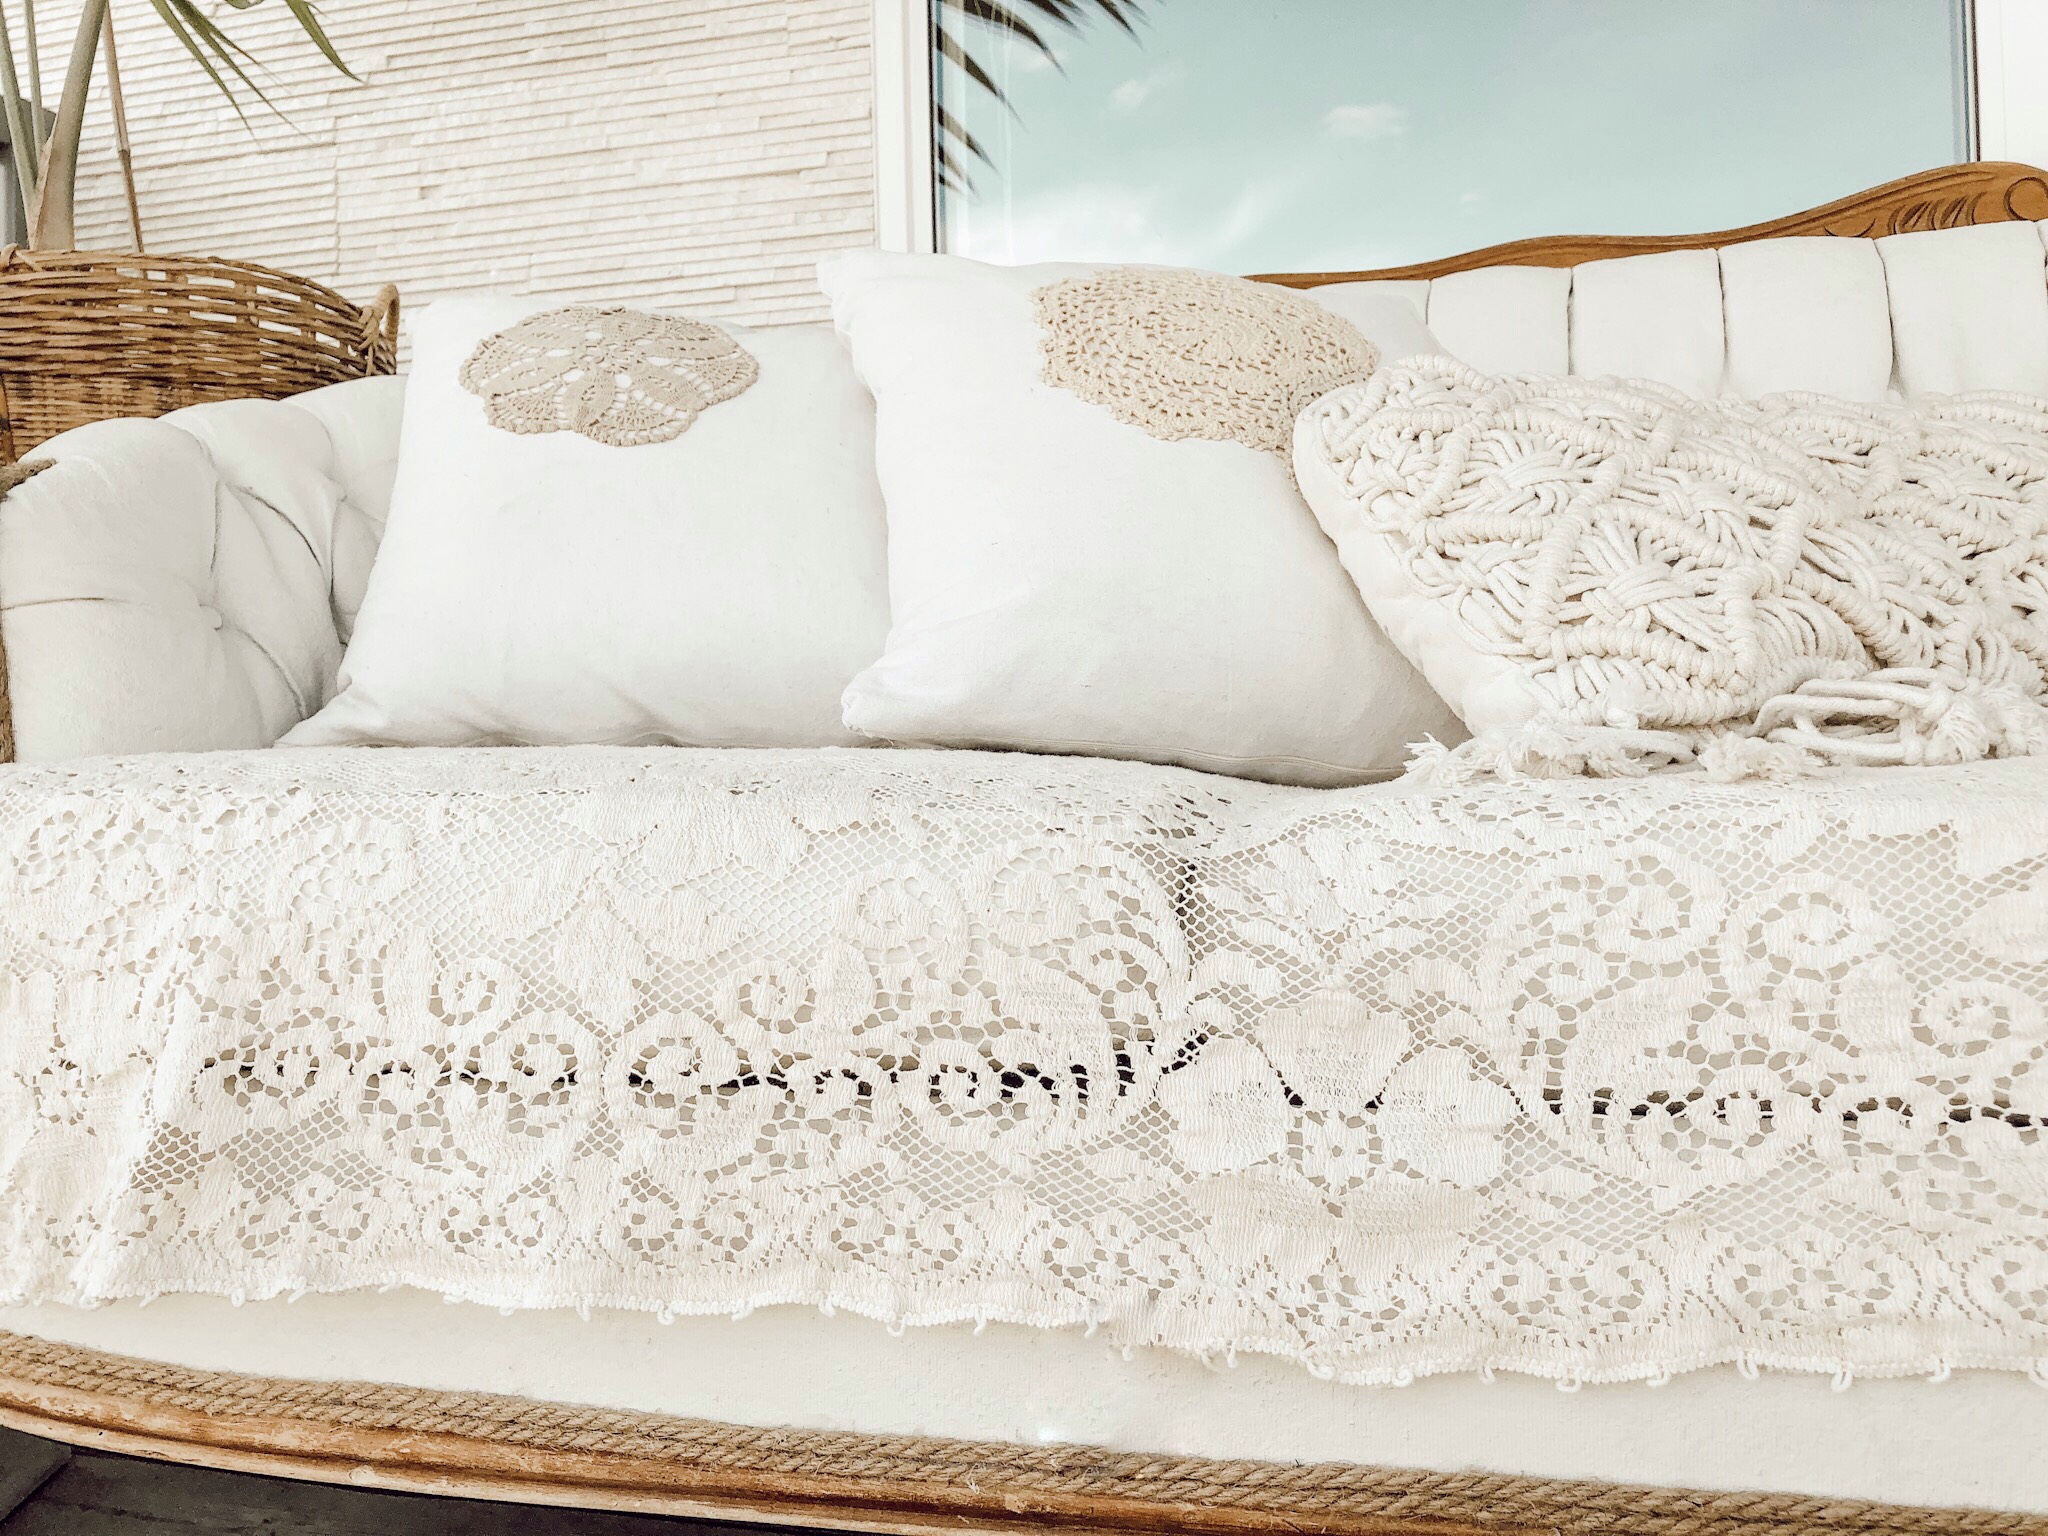
I dressed her up by laying a vintage lace table cloth across the seats and tossed a few slip covered accent cushions across her diamond tufted back to make her feel more cozy.
Every girl needs a little something to make her feel special. I hope she knows she’s loved by all the TLC I gave her. I promise I didn’t cuss once! I only showered her with praise for she’s beautiful.
What do you think? Can you see why I couldn’t walk away from her?
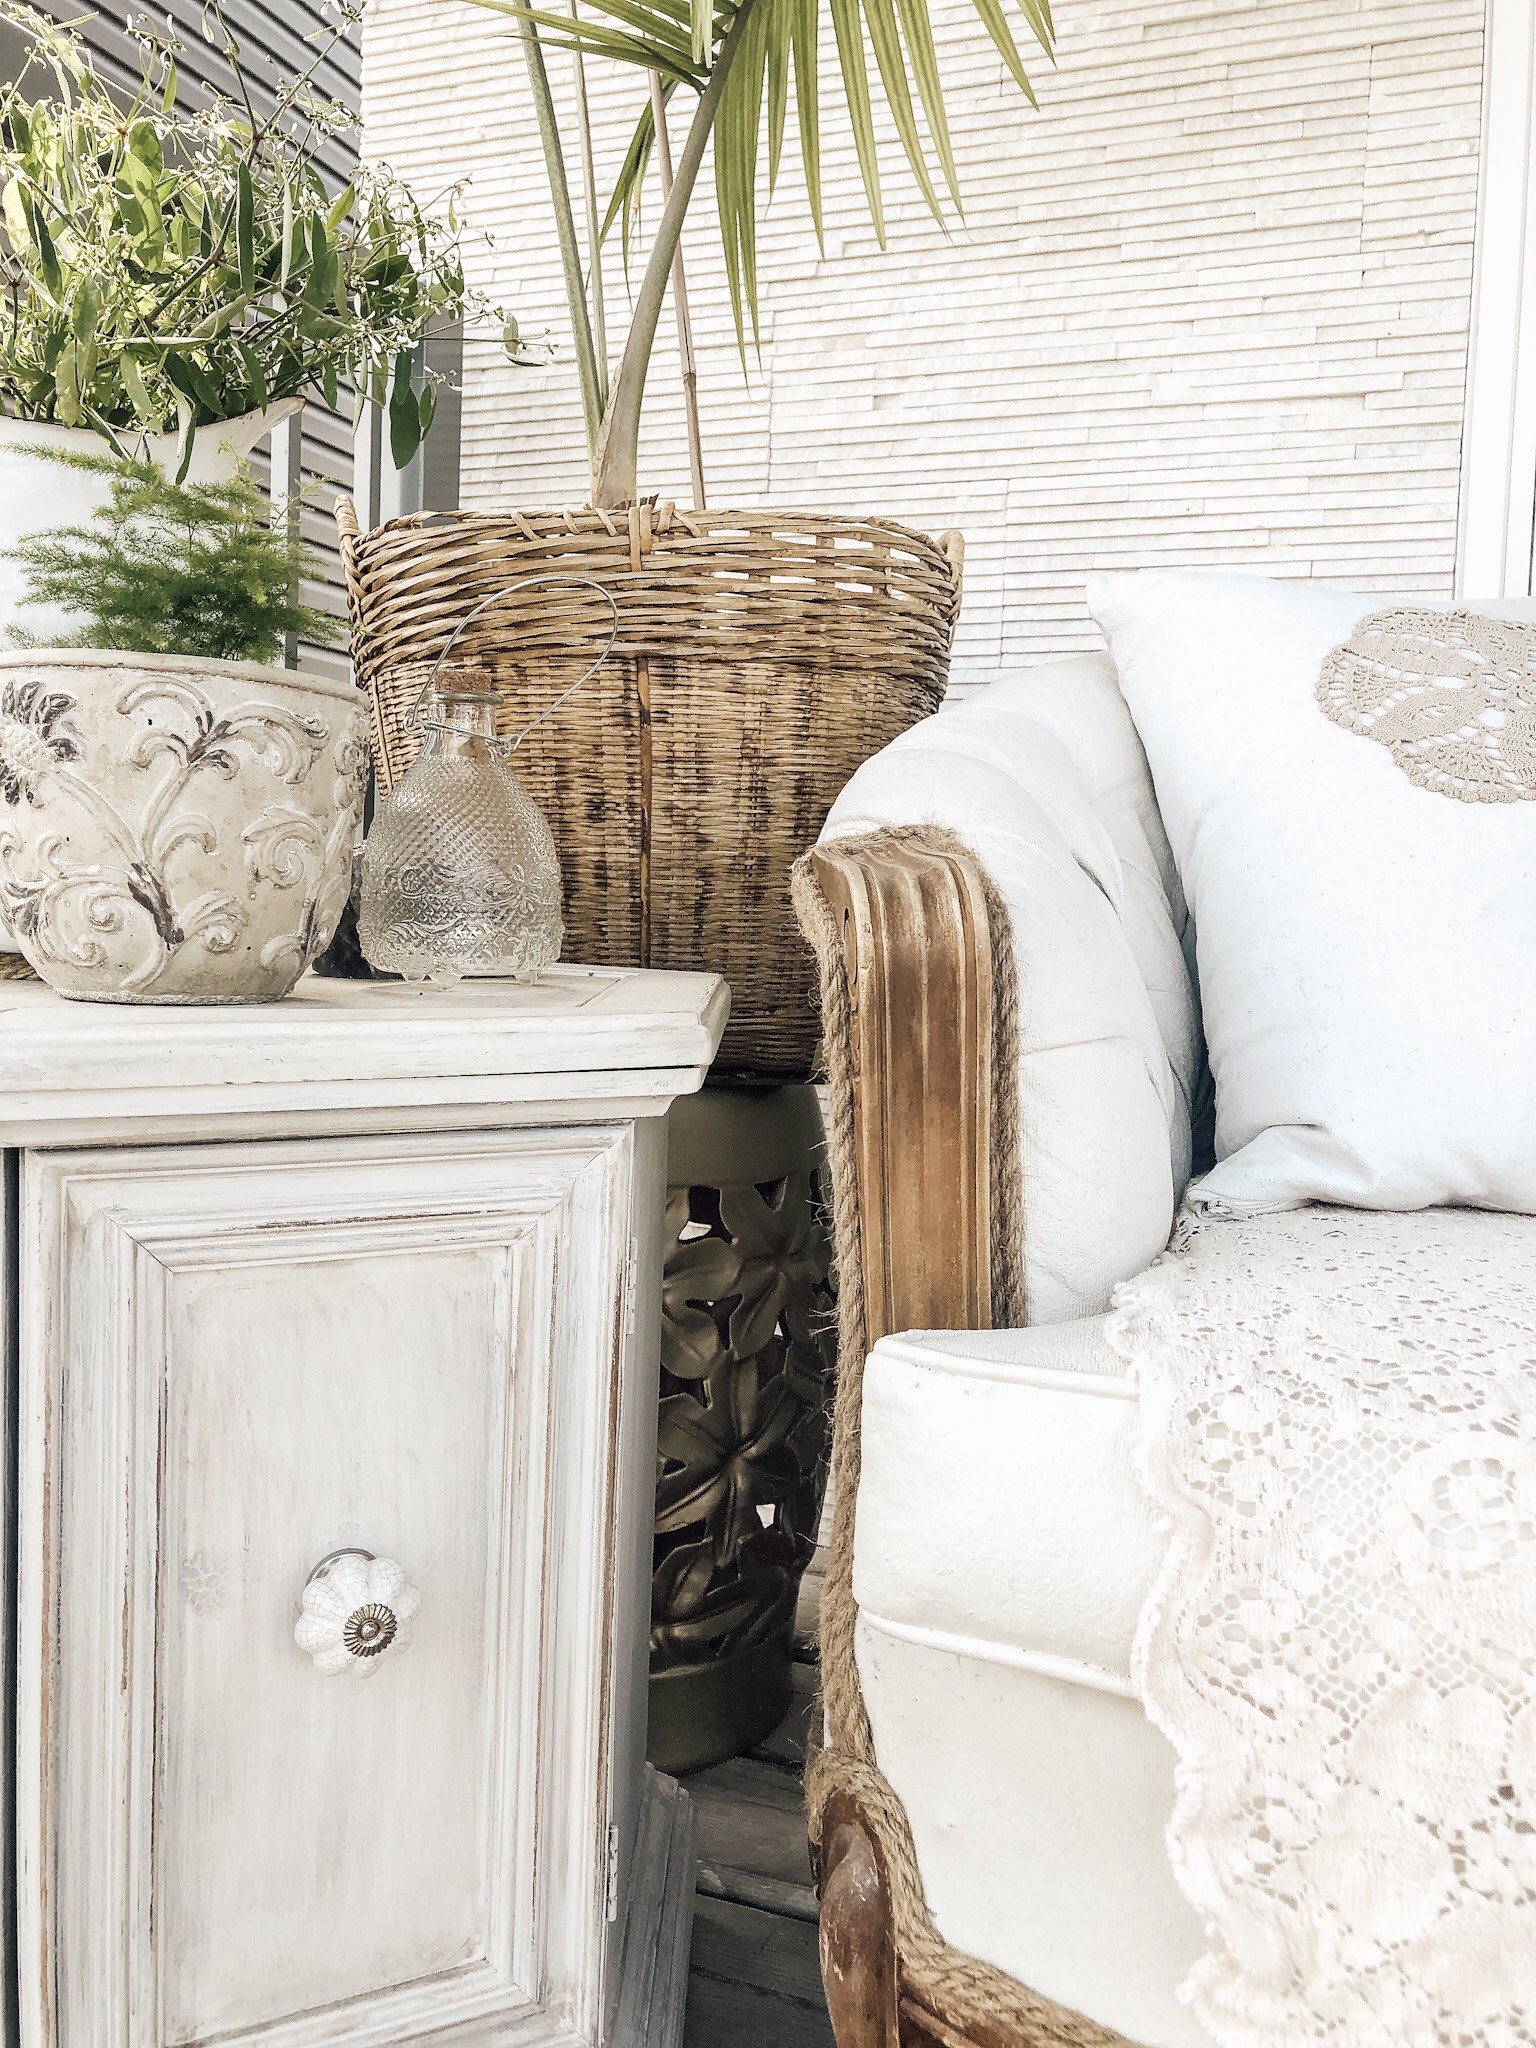
She’s the perfect companion for my DIY hall tree redesign I did in the early spring. I blogged about that project here. https://fengshuibybridget.com/feng-shui-diy-front-porch-re…/
It had been years since I painted an upholstery piece of furniture. The last was an old chair when my kids were little. Knowing paint has changed in the last 30 years I did a little research on the various techniques and what other DIYer’s consider the best paint for a project such as this. Most of my research came up with a diluted chalk paint receipe that needed a wax sealer to be applied on the final coat of paint. I wasn’t convinced that this was the best application for my girl as she’d be outside for at least 3 seasons, all-be-it she’ll be under a covered porch she’d still be subject to the elements. So I went with what I knew and what I had so here’s what I used and what I did…..
Here’s what you’ll need
- Primer – Kilz OriginalPrimer Sealer Sain Blocker Interior
- Paint – 1/4 quart Behr Interior/Exterior Alkyd Semi-Gloss Enaml Paint
- Paint Colour – Benjamine Gray Mist (this is the colour I use for all my DIY painted projects)
- Tap Water
- Spray Bottle
- Large Measuring Cup – for measuring and mixing
- Natural Fiber Paint Brush
- 220 sandpaper
- Patience, lots and lost of patience 🙂
Here’s what I did….
(Prep – I know you just want to get right into the fun part, this all needs to be done first.)
- Removed all the cushions
- Removed all the weathered upholstery trim
- Trimmed all the loose threads snagged by all her cat scratches. It was a shame that she had seen such abuse
- Removed the dust cover from under neither her
- Vacuumed every surface and crevasse
- Sprayed all stains with Shoutout
- Shampooed the upholstery with my little Green Machine
Primer (this is what I should have done first)
If you have a BOLD dark in your face print or dark fabric that you want to paint a lighter colour you’re going to want to prime the fabric first before delving in as I did with attempting to get good coverage with the diluated paint solutions I used.
- in a large measuring cup mix 3 parts tap water to 1 part primer (To reduce the risk of poor adhehsion and making the upholstery fabric feel hard, the primer is diluted and applied in 2 thin coats.)
- fill a spray bottle with tap water
- work in small patches generously spraying the fabric down well before priming the fabric with your diluted solution. The primer is best absorbed when the fabric is moist.
- with a natural fiber paint brush apply the diluted primer to the wet fabric, working the solution well into the fibres of the fabric so you get good coverage
- after the primer has fully dried sand the entire primed surface with 220 sandpaper ; this will help the upholstery feel more pliable rather than hard and scratchy
- I should have repeated the entire priming process 2x prior to applying the paint
Painting
- in a large measuring cup mix 3 parts tap water to 1 part paint (To reduce the risk of peeling paint and making the upholstery fabric feel hard, the paint is diluted and applied in multiple layers. The paint solution works much like a stain rather than a solid top coat like regular paint.)
- fill a spray bottle with tap water
- work in small patches generously spraying the primed fabric down well before painting the fabric with your paint solution. The paint is best absorbed when the surface is moist. (Depending on how heavy you apply the solutions you may want to have a non-lint rag handy to absorbe any drips that may occcur.)
- with a natural fiber paint brush apply the diluted paint to the wet fabric, working the paint solution well into the fibres of the primed fabric so you get good coverage
- after the paint is fully dry sand the entire painted surface with 220 sandpaper; this will help the upholstery feel more pliable rather than hard and scratchy
- I repeated the entire painting process 4x in addition to the two coats of water primer solution I used as an attempt to cover the red floral print. (This is were the patience is really needed) Who does 6 coats of paint and primer combined!!! Apparently I do! I should have primed first! Frustrated with the poor coverage of the first two coats of diluted paint, I applied 2 coats of diluted primer that did improve the coverage for the 3rd and 4th coats of paint. Lesson learned! (If you are painting an equally dark colour over the origional colour/print you may need less coats of diluted paint.)
Final Details
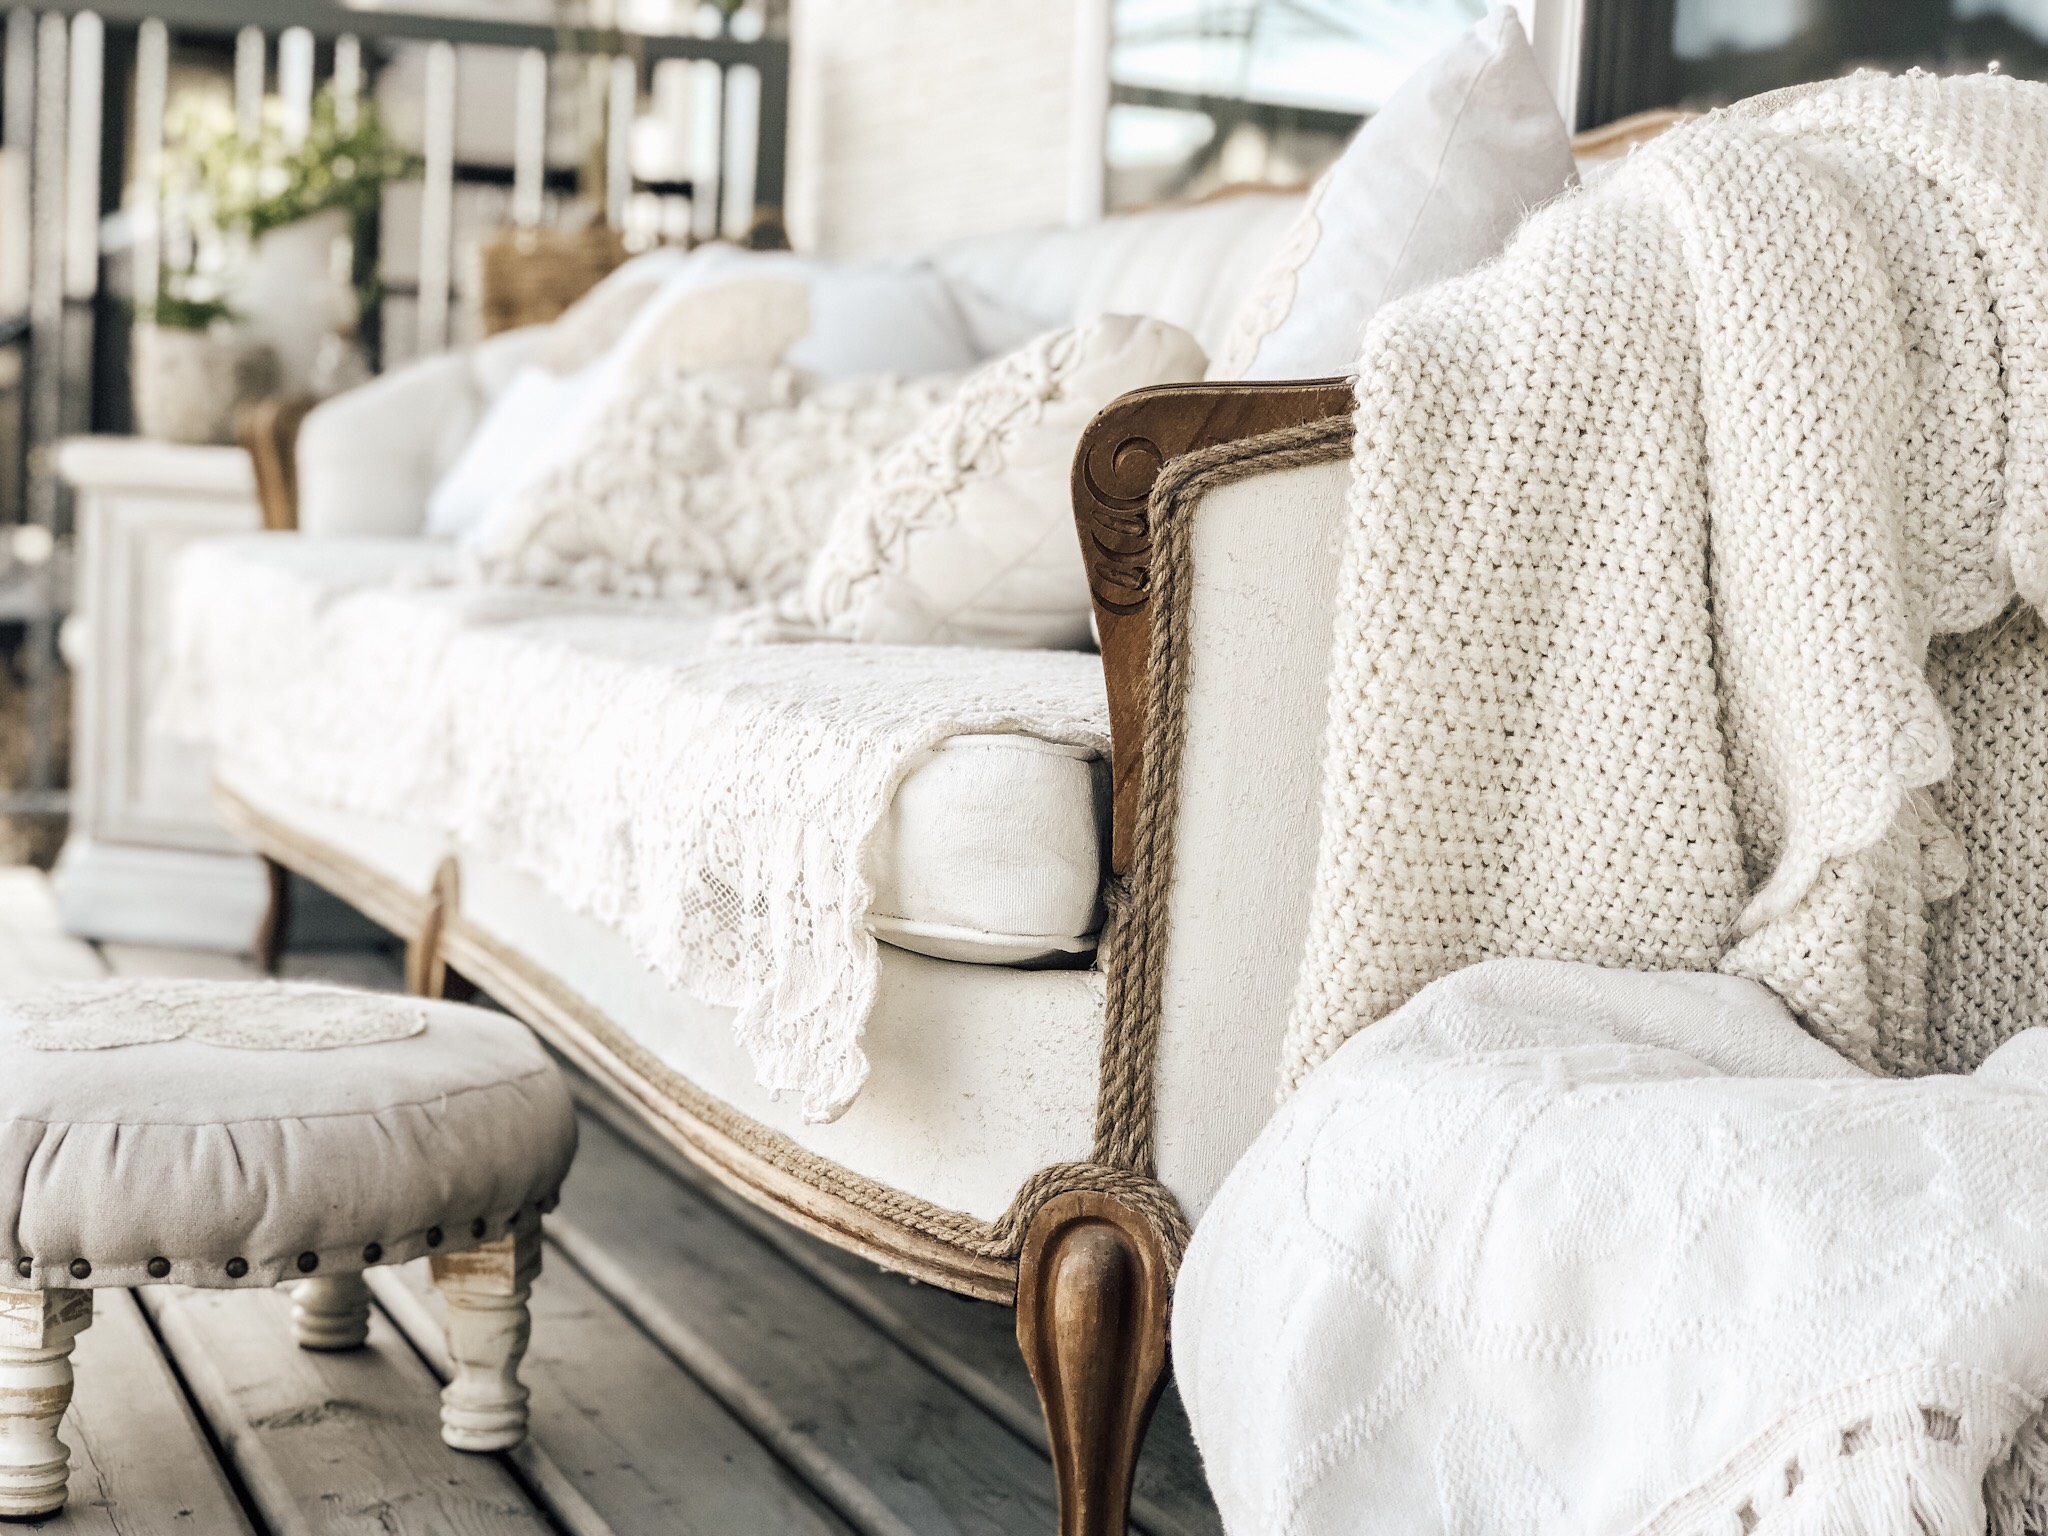
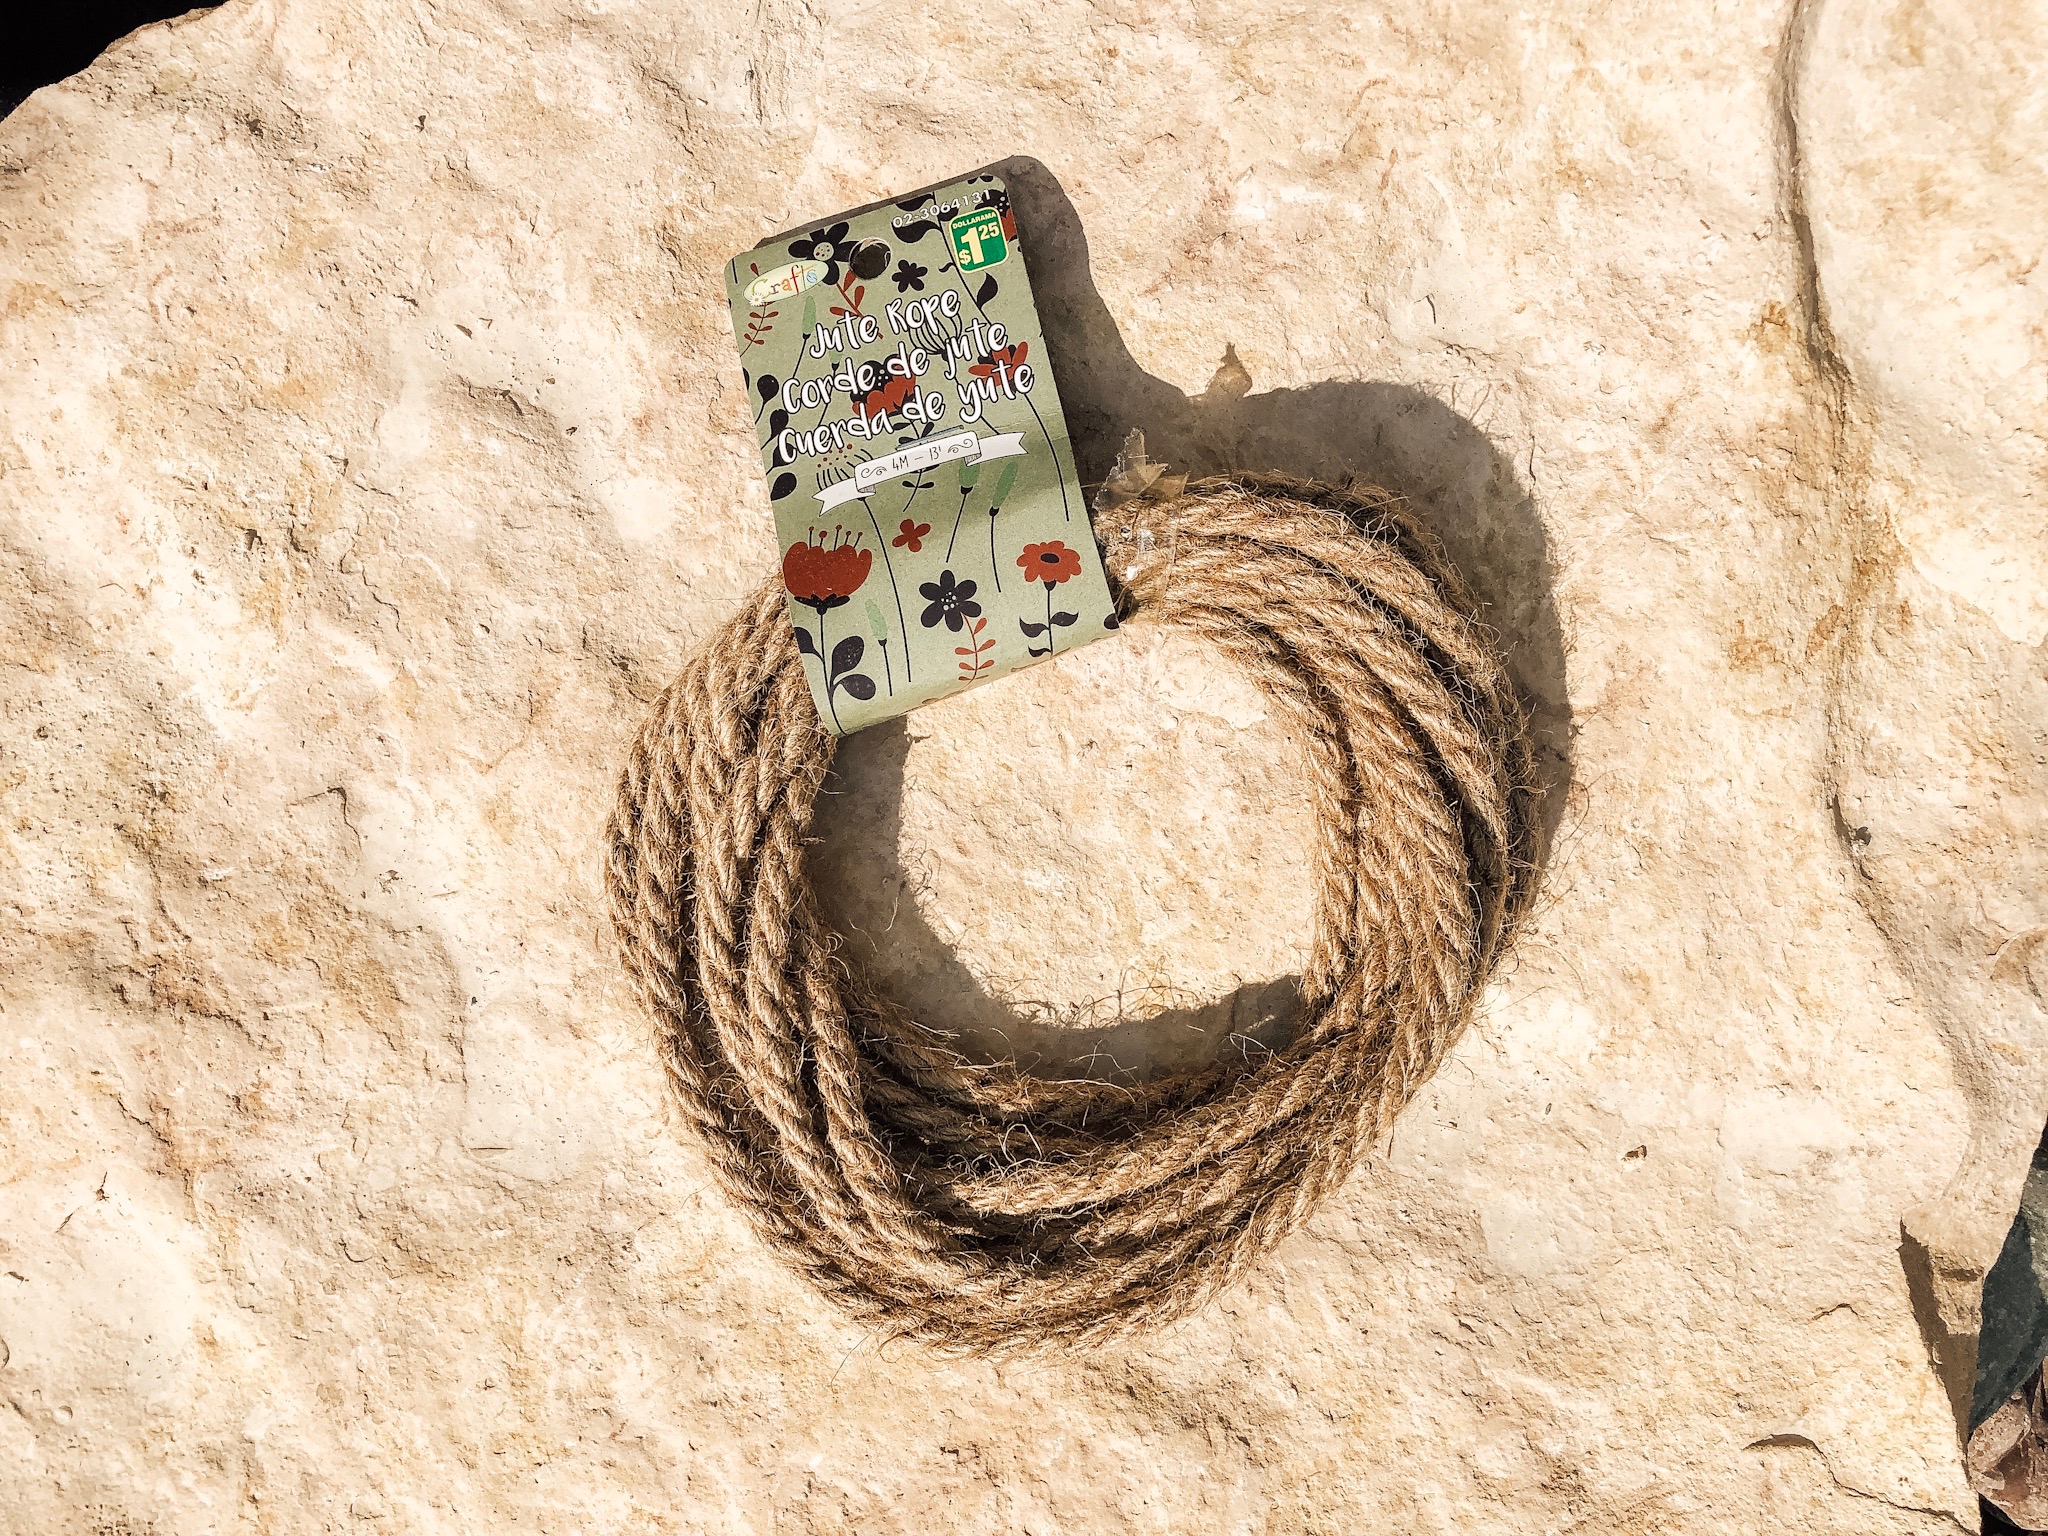
To add a little character and finish her off real pretty, I hot glued a few rows of 1/2 jute twine that I found at Dollarrama along all her beautiful wood detailing. I virtually used the twine as a replacement for the tattered red upholstery trim I removed during her prep.
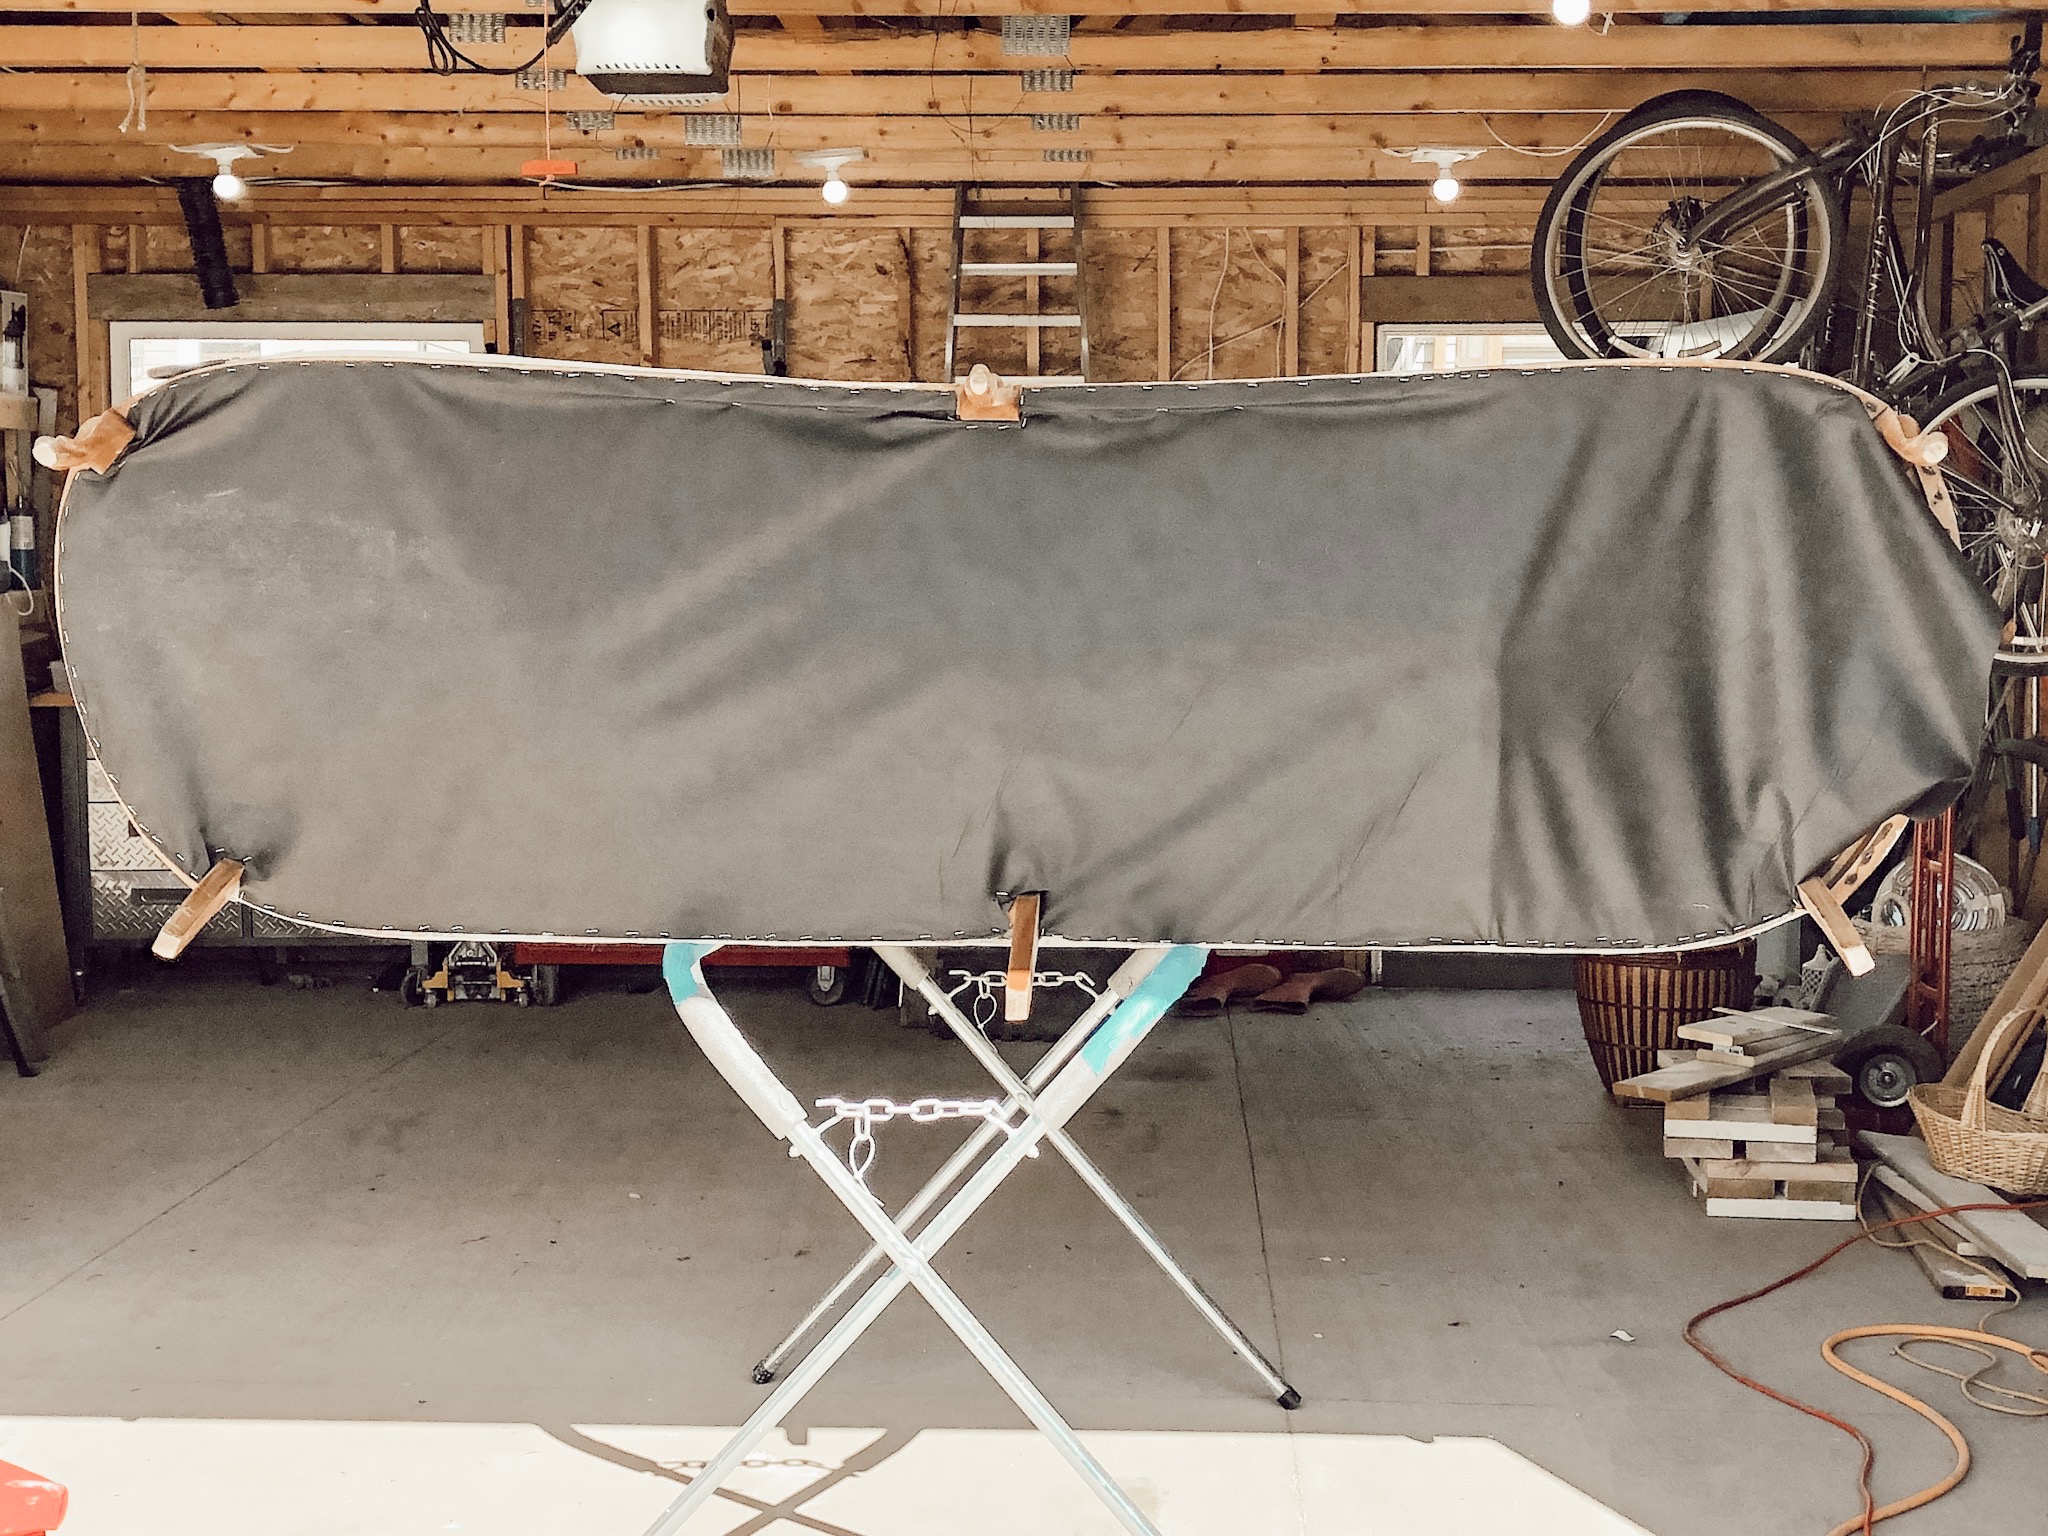
As this beauty’s going to be residing outdoors under our covered front porch I want to reduce the risk that she become a mouse house so I replaced the dirty and torn dust cover on her under side by stapling some leftover landscape fabric that I had in the garage.
She may have taken 30 hours over 6 days and cost a total of $30 bucks but she’s well worth all the back braking TLC and patience I gave her. My Honeymay have initially though I was a little crazy! My kids thought I lost my mind. Some of my friends laughed and shook their heads. My neighbours scratched their heads wondering what I was doing with this stained and tattered sofa that most people would have taken to the dump.
hummmm…..this is where you’ll find me between 4 and 5 after consulting with clients at the end of my work day. I’ll be chillin’ right here day dreaming in my cozy little spot on the front porch. Apparently mama needs a pedicure. But who has time when there’s so mucch magic waiting to be discovered!


